|
|
Advertisement:
|
|
Thecus N5810PRO 5-Bay UPS NAS |
|
Join the community - in the OCAU Forums!
|
Configuration, Benchmarks
The default address (192.168.1.100) isn't in the subnet I use at home (192.168.0.x), so I switched my PC to that subnet, connected to the NAS with a web browser, aborted the setup wizard, changed the address of the NAS, rebooted it, changed the address on my PC back to normal and we were good to go. However, I realised later that this process could have been simplified by using the "Thecus Install Utility" which will go find any Thecus NASs on your network and let you configure and rename them.
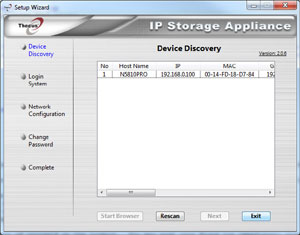
That's pretty much the only thing that the install utility does though, so if you are network savvy or if you happen to use the appropriate subnet already, I frankly wouldn't bother installing that utility. You can rename the NAS via a somewhat buried option in the Network Service section of the web console. You can apparently also do this initial config via the front LCD screen if you don't mind pressing lots of buttons. Regardless, once you can connect with a web browser the real setup begins.
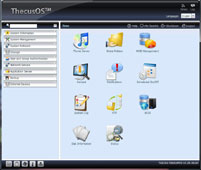 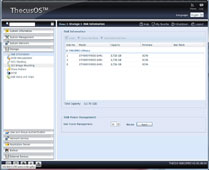 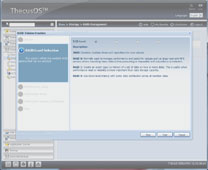
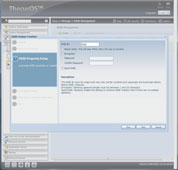
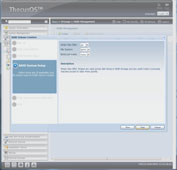
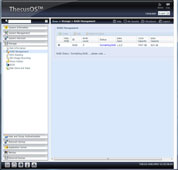
The web console pretty easy to navigate and is divided into sections via drop-downs on the left-hand side. The first step was to go into Storage and set up the array. In some of these screenshots there are unlabelled radio buttons - this was apparently a bug with displaying in Firefox which has been fixed with a later firmware upgrade. Maybe that should have been my first step. Anyway, as mentioned earlier, Seagate had kindly provided three of their ST4000VN000 4TB NAS HDDs which each presented to the system as 3,726GB. I simply added them all to a RAID5 array using the default settings which gave me a formatted capacity of 7447GB and the ability to survive a single drive failure. There is an option for quick setup but I always like to do a full format with new drives, to make sure everything is well tested before going into use. So, as expected, it took a very long time to set up the array. It took about 10 minutes before it even told me anything, which was that it was 0.7% complete. I don't know how long the creation actually took, because I went to bed. Several hours, anyway.
Once that process has finished we have a large hole in the network into which we can drop data. Many users can simply stop at this point, as there are default shares configured for windows networking and the array is available to all users. Depending on how you feel about security, it's probably a good idea to set up user authentication and check whether you really want all those shares enabled. In a corporate environment you can use active directory or LDAP authentication, set up syslog to log messages to a central server, etc. You might want to enable Apple or NFS networking. In fact, the configuration options at this point are huge.
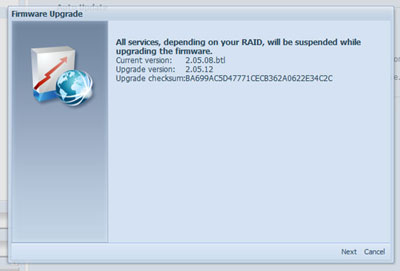
I don't know why, but these web consoles always seem to be a bit cumbersome to use. This one has a few quirks - the firmware download page doesn't seem to work at all, for example. You can download a file manually and update it via the same page, though. There's a few more options which aren't explained on the console or in the manual. But overall you can muddle through and generally find what you need.
I mentioned earlier that the Quick Install Guide is probably overly light on detail, but that is more than made up for by the manual, downloadable from Thecus's product page for this model. I know we tend to scoff at documentation but I happened to have a 24 hour internet outage here a few days ago and had already downloaded the manual, so spent a while going through it and am impressed. If you're interested in getting the most out of the features of this NAS, it's worth taking the time to browse through the manual. Once you start getting into very advanced configuration, particularly of downloadable app modules, you'll end up searching the Thecus website and forums, as well as various user groups and discussion forums elsewhere on the web.
Before we go any further though, I suppose we'd better benchmark the thing. To be honest there's not a lot of validity in this test, because I don't have any directly competing units to compare it to. My existing NAS is five years old now, so is different from this Thecus unit in pretty much every way possible. It only has 128MB of RAM compared to the 4GB in the Thecus, and a much slower CPU. It has four Samsung "Green" 2TB drives, also five years old, as opposed to the three 4TB Seagate NAS drives in the Thecus. But I suppose it will give us a general idea of what to expect.
 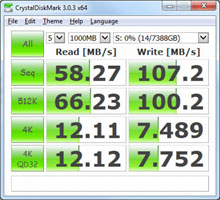 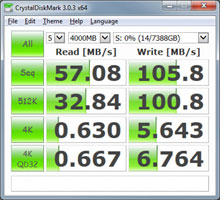
L - R: Old NAS 1000MB, Thecus 1000MB, Thecus 4000MB
In the 1000MB test, the Thecus roundly beats the older NAS. In the write tests it slaughters it, which is probably because we're simply writing into the 4GB of RAM on the newer unit and not being impacted by the disks at all. To push things a little harder I ran the 4000MB test on the Thecus as well and the figures were lower but still impressive. Again, it's difficult to draw too much of a conclusion from this test apart from that the Thecus is "fast enough" - the exact figures largely depend on the model and configuration of hard drives used. We could also expect more speed if we were using the additional two bays in the array. But for my intended use, this unit is plenty fast.
I plugged a USB 1TB drive into the front USB3 port and its contents immediately became available through the "USB_Share" folder. Also, via the LCD screen with two button presses you can back up an entire USB device, the contents of which will be copied to a "USB_Copy" share, in a folder with the current timestamp. Pretty handy.
So, as a basic NAS, this unit seems to work just fine. But this ISN'T a basic NAS. I wanted to dive a little deeper into some of the more interesting features.
|
|
Advertisement:
All original content copyright James Rolfe.
All rights reserved. No reproduction allowed without written permission.
Interested in advertising on OCAU? Contact us for info.
|

|