|
|
|
|
|
CoolerMaster AquaGate Liquid Cooling System |
|
Join the community - in the OCAU Forums!
|
Installing and Connecting the LCU
Assembling the Components:
The Instruction Guides next step was to cut the water pipes to match the distance between the LCU and the waterblock. Given that I intended to test the LCU and its performance when mounted in both external and external configuration, I decided not to cut the water pipes and instead leave them at their full length, as this would allow for more flexibility when I was ready to adjust the setup. CoolerMaster indicated that when running the LCU internally it would increase the internal case temperature, so I wanted to see if this would have an impact on its performance.
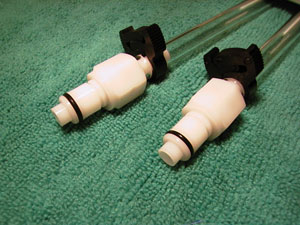
After trimming the pipes to the correct lengths the non-leaking plugs where then attached to the free ends. The barbed plastic non-leaking plugs were secured using the supplied plastic ratchet-type pipe clips. Although the plastic pipe clips appeared to be a little flimsy, by attaching them between the plugs barbs and carefully tightening them first by hand and then gently with a pair of pliers, I had no problems creating a secure and water-tight fit.
The Instruction Guide indicates that the LCUs coolant tank should now be filled until it tops out. The AquaGate kit includes a 500ml bottle of Thermal Conductivity Fluid and CoolerMaster indicate that it is a special liquid coolant, which does not conduct electricity, only heat. The bottle also indicates that the coolant does not cause corrosion even though there are both copper and aluminium parts in the system. Not only that, its an attractive blue colour too.
In order to fill the coolant tank, the bottle is fitted with a pointed nozzle, but while this does reduce the spillage, I still found it a little cumbersome. The spout tended to spurt when the bottle is first tilted, causing splashes off the edges of the reservoir, and when removing the bottle it tended to gush out at the last second, leading to an overflow of coolant. A number of items around my PC are now stained with a few bright blue splash marks.
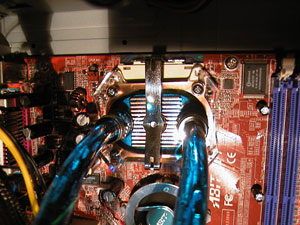
Things are starting to come together now that were ready to connect the plugs to the back of the Liquid Cooling Unit. First the D-bus cable is connected the other end was already attached to the external D-bus port on the PCI card. Then the LCUs AC power cable is connected, and CoolerMaster note Be sure to use the proper cord for your region (either the 200V or the 110V). Finally the two non-drip pipe plugs snap into the back of the LCU there is no in or out, as the waterblocks design does not require specific in or out connections.
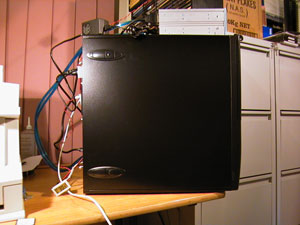
In the picture above, the PC and AquaGate are both running. The temperature readout at the bottom left, a unit I bought separately and not included with the AquaGate, is reading the internal case temperature. Another external temperature probes cable can be seen to the top right. The temperature probes and the AquaGates PCI card are powered from the Antec PSUs external Molex connector socket.
Powering up and Bleeding the System:
With everything plugged in it was time to get things rolling. Generally we would recommend to leak test the system first running the system for some time before incorporating it into the PC. I felt that the connections were all adequately secured, and the manual did not mention this step, so I installed everything without testing, and have run it since without any problems.
When the AquaGate and PC were both setup and running (see the next page for the bit that Ive just skipped over) and coolant flowing through the pipes, it was time refill the coolant tank, and bleed out the air bubbles. As per the Instruction Guide the air was removed from the system by tilting the LCU in each of the cardinal directions for approximately 10 to 15 seconds to clear any air bubbles from the coolant and pipes. I found I needed to repeat this procedure a number of times before I was able to fill the reservoir to its maximum level.
The next page outlines some self-inflicted setup problems that I encountered and also some pump noise problems that CoolerMaster previously warned us about, so feel free to skip to the Using the AquaGate page if they don't interest you.
|
|
Advertisement:
All original content copyright James Rolfe.
All rights reserved. No reproduction allowed without written permission.
Interested in advertising on OCAU? Contact us for info.
|

|