|
|
|
|
|
CoolerMaster AquaGate Liquid Cooling System |
|
Join the community - in the OCAU Forums!
|
Using the AquaGate
The AquaGate has no separate on/off switch and once its setup and installed it will power on or off with the computer system. All that needs to be done to run the system is to adjust the appropriate fan speed setting and configure the alarm temperatures. Like the rest of the design, CoolerMaster have made the system very easy to use.
The AquaGates fan can be controlled by setting one of three speeds. CoolerMaster indicate the following specifications for the fan speeds: Speed 1; 2000 rpm at 23 dBA, Speed 2; 3100 rpm at 34dBA, and Speed 3; 49 dBA at 4600 rpm. Fan Speed 1 is a quiet but still audible hum, and sounds about the same as a typical power supply. At Speed 2 the fan and air intake noises are much more noticeable, and probably about the same level as a high performance after market cooler.
At fan Speed 3 the system starts to become annoyingly loud, louder than the dual YS-Tech 60mm screamers on the HSFs of my server. Unlike other CPU coolers where the sound of the fan is muffled by your PC's case, the AquaGates fan is on the outside. Additionally, while CoolerMasters 49 dBA rating may be true for the fan in clear air, the fact that the air is drawn in through the front grille and then blown across the radiator fins add to the noise level. There is actually a noticeable difference in sound and pitch if the front grille is removed while the fan is operating at Speed 3.
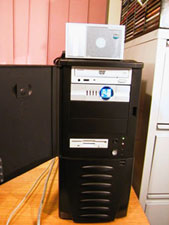
The soft hum of the AguaGate on Fan Speed 1 is noticeable especially when the unit is mounted on the top of the case - so unfortunately it does not quite count as silent computing. However, given that the LCU can be mounted externally, up to 1m away from the system, or internally where some of the sound would be muffled, it would not be too hard to find a suitable configuration where the sound of the system is virtually negligible.
 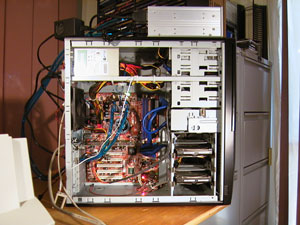
The LCD can also be mounted in a drive bay; the white wire is the internal temperature probe. Note that the shutdown sensor cable is not actually attached to the PCI card, but the system is still running in the photographs.
As an alternate setup, the AquaGate was also configured with the LCU mounted externally but the LCD mounted in a 5.25 bay. The LCD was rotated 90 degrees so that the display remains horizontal. In the picture above, you can see the LCD extension cable which internally connects the LCD to the PCI card the D-bus cable is still connected on the outside of the case, and is required for the LCU to function.
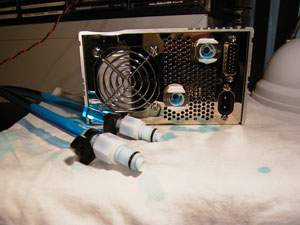
Disconnecting the Liquid Cooling Unit, to move or reposition it is a fairly simple matter simply unclip the two hoses and pull out the power and D-bus plugs. The LCUs non-leaking connector ports and the non-leaking pipe plugs allow the system to be disconnected with virtually no fuss or mess, and they are very nearly drip-proof as you can see in the photograph above.
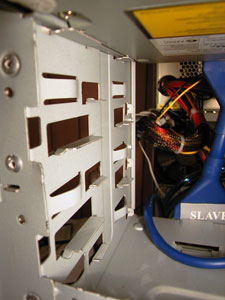
The fold-down drive rest tabs prevented the LCU from being installed internally.
After running the first series of tests, the LCU was disconnected ready to be mounted internally into a set of two 5.25 drive bays. I was quite surprised when it didnt fit! No pushing or shoving could get the unit to slide into place; the side-guide-channels cut into the aluminium housing of the LCU were simply not deep enough for the unit to fit between the drive bay fold-down drive rests.
Given the range of user-friendly features in the AquaGates design, I was surprised that it would not fit into the drive bay mounts without modifying the case. While the drive rest tabs could be mangled and bent back up out of the way, this would mean that the drive rails would not work when the LCU was removed. Thinking that the problem could be simply related to the tabs and drive rails on the Antec SLK3700-BQE case, I tried to fit the LCU into several other chassis that we have here.
The LCU could not be mounted in an AOpen HX08 or AOpen HQ45 (even though both these cases have much smaller drive rests and do not use drive rails), it also didnt fit into two of the three generic cases that I tried. It does fit in our newly purchased Antec Sonata, and one would expect that it fits into any of the CoolerMaster cases on the market. However, if you intend to use the LCU internally youll either need to ensure your case has small (no bigger than about 1mm) drive rest tabs, or youll need to bend the tabs back out of the way.
|
|
Advertisement:
All original content copyright James Rolfe.
All rights reserved. No reproduction allowed without written permission.
Interested in advertising on OCAU? Contact us for info.
|

|