|
|
Advertisement:
|
|
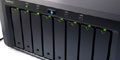
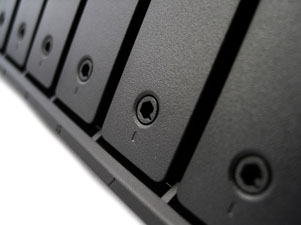
Synology DiskStation DS1812+ NAS |
|
Join the community - in the OCAU Forums!
|
Installation & Setup
Installation & Setup:
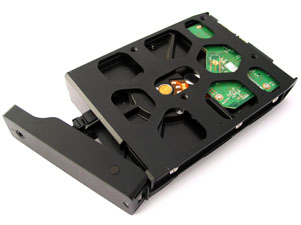
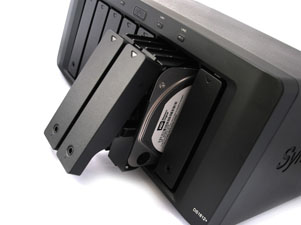
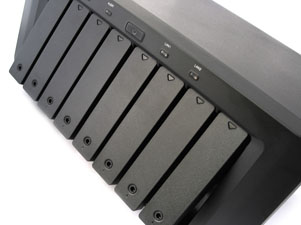
So lets get started with this new unit! Connect the power, use one of the provided Ethernet cables and connect it to your router/switch and start pulling out the hard drive caddies pre-inserted into the unit. The caddies use a push button to unlock the bay from the enclosure, and then its just a case of pulling on the level to slide it out. Use the provided screws to install as many 3.5 or 2.5 hard drives as you intend on using; please note that you should have at least one hard drive (compatibility list can be found here) installed before booting so you can configure the unit successfully. After you have installed all the drives you're using into caddies, slide them in to the slots from left to right, and push on the lever to secure them to the enclosure. For added security and just general safety, Synology have made each bay lockable - this can be done with the keys provided after each hard drive has been installed.
Once all the physical connections to the power and network have been made and the hard drives installed, its time to power on the unit by pressing the power button on the front of the unit. The button will pulsate blue once powered on. Upon first power-on youll notice a few lights illuminate and the status light will continually change from orange to green. Wait for the unit to give off a single beep letting you know its ready to go. If anything other than a single beep is heard the unit might require some troubleshooting.
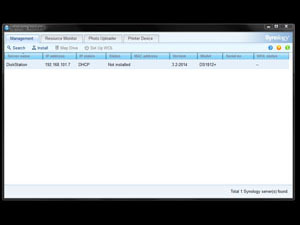
Next comes the actual configuration, so insert the provided CD to your Windows PC, Mac or Linux system. Windows users will be greeted by an autorun prompt to run the application on the disc, and then click on Start which will start the Synology DiskStation Assistant that allows you to find and configure the new device, as well as monitoring capabilities and a simple photo uploader, printer manager and shared drive mapping tool for those not-so-tech-savvy. But at this stage we just want to configure the unit and get it all working, so in the first window click the search button to find the unit on your network, as long as you have DHCP enabled it should pick it up without any issues (even without DHCP the software finds the unit), once found on the network, click on the install button.
 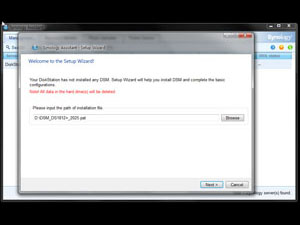
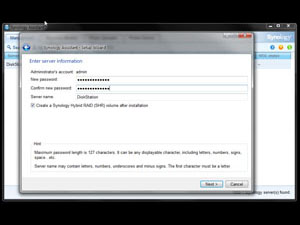
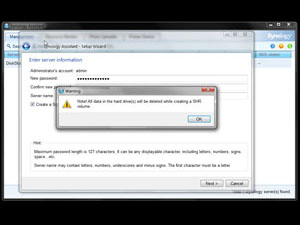
The next prompt will ask you for the path of the installation file, this is basically the firmware or operating system of the unit. On the installion disc you will fine a version of the software for your specific model, but since we were aware of a newer version avaliable on Synologys website we downloaded that and pointed the installer to that location. The next step will ask you to assign a adminitrator password for the admin account as well as a name for your DiskStation. There is a tickbox to create a Synology Hybrid RAID volume after installation, for most users this is a simple way to get started without the need to choose a RAID level, or if you have a mix of different sized hard drives. If you dont tick this option, you can configure your RAID level after logging in. After you click next a prompt will alert you that any data on these drives will be lost upon proceeding.
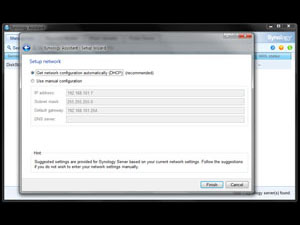
Moving on to network settings, its best to assign your unit a static IP address as well as all the other networking details based on your setup at home, and while DHCP can be used by default, its not recommended unless you really arent sure on what settings are required or used on your home network. After clicking the next step the software will start configuring the device and installing the operating system. This may take a while, so its worth making yourself a coffee while the software does its configuration and rebooting.
 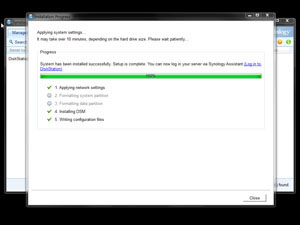
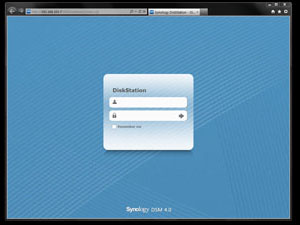
After the entire configuration is complete youll be presented with a hyperlink to log in to DiskStation just above the progress bar. Otherwise you can just enter the IP of the device in your web browser and get to the login screen for the unit. One the webpage is loaded you have to enter your username admin and the password you selected during the configuration process.
 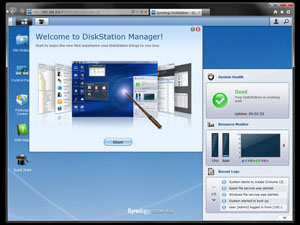
Once logged in, youll be greeted by a quick start guide that helps you configure features, RAID levels (if not configured initially), make shared folders, setup backups and many common services that the unit provides. If you allowed the configuration utility to create a Synology Hybrid RAID the unit may still be formatting the disks installed - the length of time can vary based on how many hard drives are installed as well as the size. Any power user would skip this initial creation in favour of choosing a RAID level required as well as opting for the system to scan for bad sectors on the drive, which further increased the RAID creation time.
Nevertheless, if you get stuck at any point or arent sure how to configure a certain option or feature, the provided PDF user guide cover each aspect of the unit as well as configuration for Mac and Linux systems, and Synology have a very active online forum to help with such issues as well as an extensive online FAQ with plenty of tutorials.
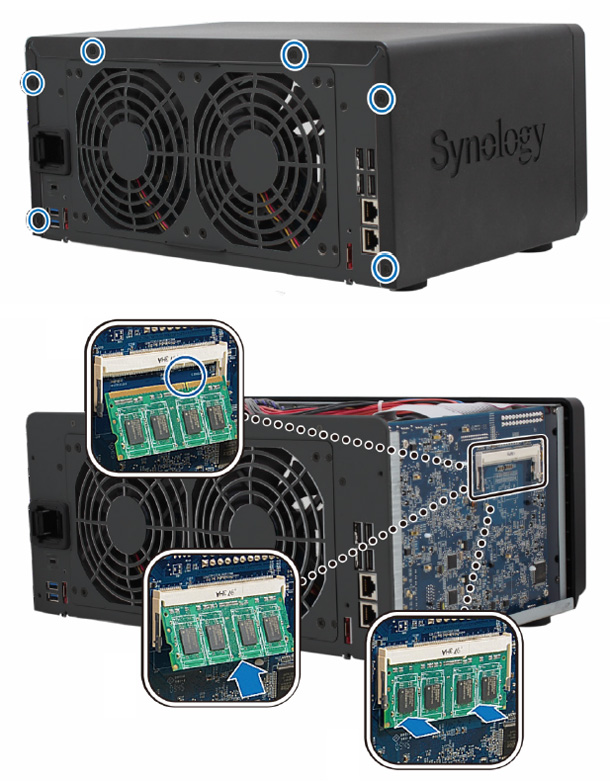
Note: For users purchasing the additional 2 GB memory module, installation is as easy and removing six screws from the back and installing the module like you would in any laptop.
|
|
Advertisement:
All original content copyright James Rolfe.
All rights reserved. No reproduction allowed without written permission.
Interested in advertising on OCAU? Contact us for info.
|

|