Motherboard, BIOS
MSI Z87 MPOWER Motherboard
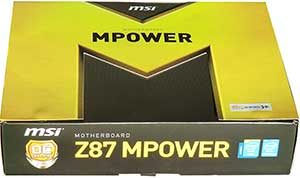 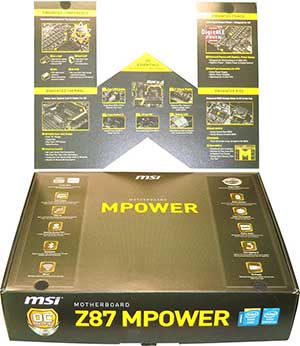
MSI are using the Z87 chipset and Haswell launch to make a big push into the OC market, with the continuation of their MPOWER line of boards. For fancy box enthusiasts, the MSI Z87 MPOWER doesn't disappoint, with a big 'M' flap, pretty pictures, and bright yellow colouring. For those that care more about actual contents, the MPOWER comes with a generous bundle of goodies, and even a bit of humour:
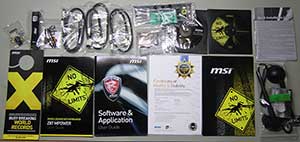
The top row of goodies contains, from left to right: front panel extender, SLI bridge, voltage-check multimeter connectors, 6 right-angle connector SATA cables, IO backplate, Wi-Fi 802.11 b-g-n / Bluetooth 4.0 / WiDi 4.0 module, 2 driver DVD's and a quick install guide.
The bottom row includes a cheeky door-knob hanger to prevent unwanted intrusions to your OC den, motherboard / BIOS manual, software and application guide, a MIL-STD-810G certification from Integrated Service Technology, a full colour, nearly-A3-sized motherboard layout poster, and finally two antennae for the Wi-Fi/BT/Wi-Di module. Pretty comprehensive!
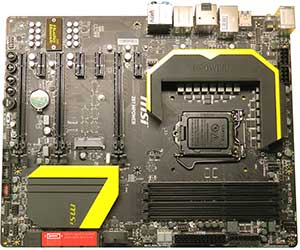
The board itself is somewhat understated; the matte black finish with yellow highlights combine to create a nice clean look. Note the dual 8-pin EPS connectors for CPU power, the first indication that this board is built for extreme power loads.
Motherboard manufacturers are in a seemingly endless battle to convince the world that their boards are the toughest around. MSI uses US military specifications as a standard of toughness, and their latest version, Military Class 4, uses aluminium "Dark CAP" low ESR (Equivalent Series Resistance) capacitors that can apparently withstand up to 260 degrees Celcius, Super Ferrite Choke inductors that are rated up to 60 Amperes, Hi-C CAP tantalum capacitors, and the current iteration of their DrMOS voltage regulation circuitry.
MSI boast about how clean their socket area is, and it is indeed quite uncluttered; while it's nice and minimalistic to look at, the ease of insulation against moisture ingress is the real reason for the lack of components in this area. Sub-zero OC'ers rejoice.
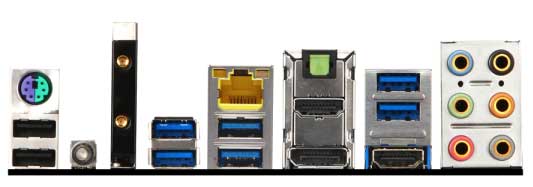
The IO backplate contains, from left to right: PS/2 mouse or keyboard connector, 2xUSB 2.0, clear CMOS button, detachable Wi-Fi/Bluetooth module, 4xUSB 3.0, RJ-45 for Ethernet, DisplayPort, HDMI, S/PDIF, HDMI, 2xUSB 3.0, 3.5mm audio input and output.
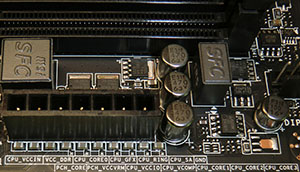
The row of 7 pins next to the 24-pin ATX power supply connection is for checking voltages with a multimeter, another feature that extreme overclockers will love. In addition to the 7 pins there are some solder pads that allow checking voltages for the values listed on the second row of text in the picture above.
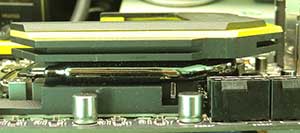
The big MPOWER heatsink uses heatpipes to help dissipate extreme OC power loads.
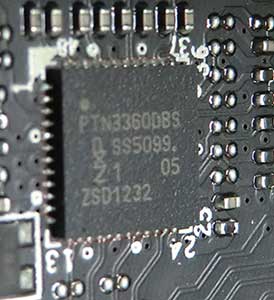 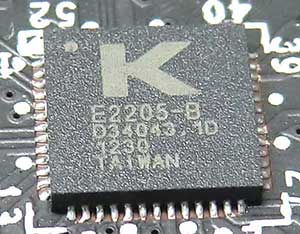
Various other IC's populating the board include an ASM1074 USB3 controller from Asmedia, a Nuvoton NCT7802Y hardware monitoring IC, a PTN3360DBS Display Port Level Shifter from NXP, and an E2205 Killer network interface card (NIC), which MSI claims can not only lower your pings, but also improve Gigabit Ethernet file transfer speeds.
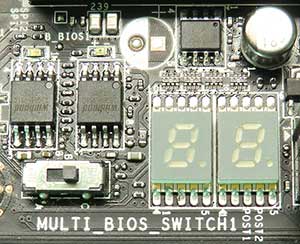 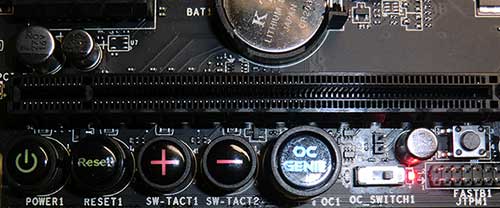
The BIOS switch is a handy feature worth special mention. It allows you to easily switch from one BIOS to the other, which is certainly preferable to relying on the board sensing a boot failure and making the decision for itself. The OC buttons are pretty standard fare on enthusiast motherboards these days, although a handy addition on this board is the little push-button on the right, which MSI calls GO2BIOS. It's basically an alternative to pressing the delete key on your keyboard while the system is booting.
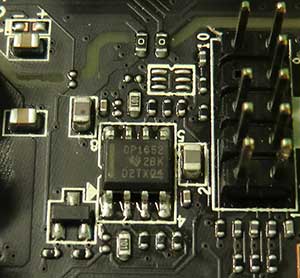
Onboard audio is courtesy of a Realtek ALC1150 IC, supporting 7.1 channel audio and S/PDIF. Further amplification is provided by a Texas Instruments OPA1652 op-amp, which boasts an impressive 0.00005% distortion at 1 kHz. With onboard audio like this, even the most pedantic audiophile would have a hard time justifying a discrete sound card.
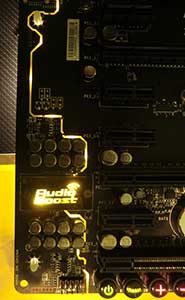
Unlike unwanted noise, the visuals on this part of the board are pretty loud. The divider that electrically isolates the audio section of the PCB is blinged up with LED's aplenty. OCAU's creative case modders could have some fun with this, as the LED's creating this effect are on the underside of the board, which gives even more opportunity for pimping that rig. Note the outline of the board in the picture and the lighting on the box underneath.
MPOWER BIOS
UEFI development has been hotting up recently, and MSI is not being left behind with their latest: Click BIOS 4.
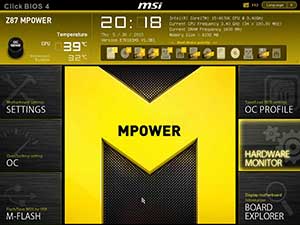
The home screen is nice and simple, listing a few key features such as CPU and RAM frequencies, CPU and motherboard temperatures, time, date and BIOS version. There is also a quick, drag-and-drop boot device priority setting.
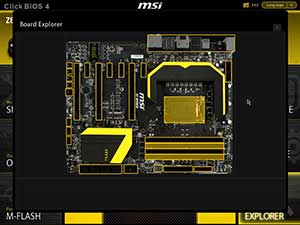 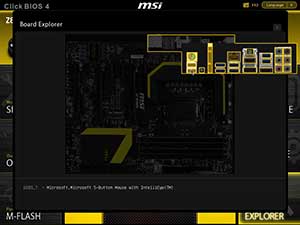 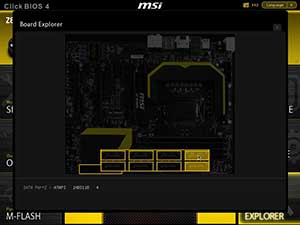
Board explorer could come in very handy for those with a lot of peripherals. You simply mouse over any port and it will tell you the name of the device attached to it. Simple, but could save a lot of hassle.
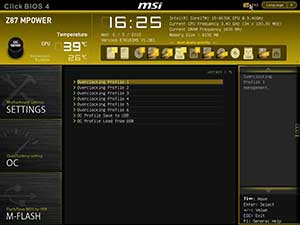 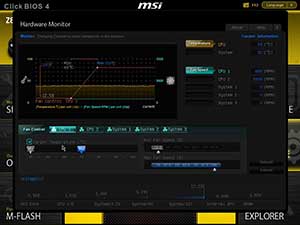
OC profiles, and loading those profiles from a USB stick, aren't new but they're certainly handy. The hardware monitor is a nice and simple interface for setting fan speeds to try and keep the CPU in the temperature zone of your preference.
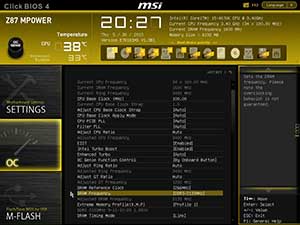 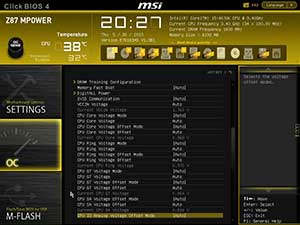 
The long list of OC options gives the enthusiast plenty of things to tinker with.
 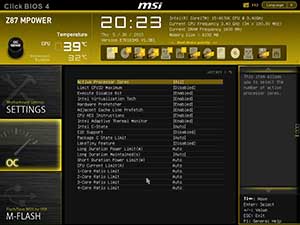
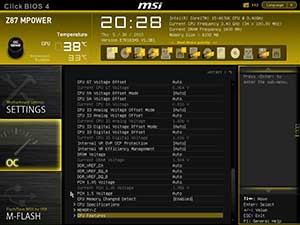
There's even a page for making sure your DRAM stays fit. If you work for JEDEC you might have a clue what's going on here, but it's probably safe to say 99% of users will leave this menu alone. CPU features are also comprehensively covered.

Vdroop is controllable in 5% increments up to 40%, and then in higher steps up to 100%, although 100% seems pretty likely to fry your CPU.
|