|
|
|
|
|
Cantenna Constuction and Mischief, with Vindaloo and Froodogs! |
|
Join the community - in the OCAU Forums!
|
Pics by Vind and Froo, article by Vind.
It seems the latest craze in the PC world is wireless networking. Consumer level products like Apple's range are bringing wireless networking into the budget range of the average PC user. There are some security concerns though, and this is what prompted me to explore the wireless world for myself. I purchased a cheap wireless PCMCIA network card for about $80, and a pigtail to suit it for $40. I already had a laptop to use the card with, which cost me $100 and a bottle of my chilli honey beer. It's a crappy old P120, with a 1 gig hard drive and 40 megs of RAM. It's got 2 PCMCIA slots though, and that's what matters.
I'd been wardriving (driving around in a car with a mate looking for wireless networks) before, but with no external antenna, we got some of the more powerful access points (APs), but not much else. Fun, but something was missing. So, we decided to make a cantenna! We used a page found here as a guide. So, let's set the scene. Here's Froodogs.

And here's me, Vindaloo. Note the extremely intelligent face I'm pulling.

Only their mothers could love them. So now that you're familiar with our ugly mugs, let's begin!
I'd like to note at this stage that we don't know much about this sort of thing at all. We just decided to give it a bash, hence the extremely non-technical spin to this article.
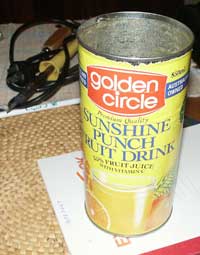
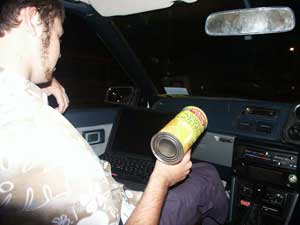
So, first things first - find a tin can, and empty the contents. We found a "Golden Circle Sunshine Punch Fruit Drink" can. We picked it mainly because it said "sunshine" on the label. Plus, it was only $1.30. AND, it tasted good! Bonus.
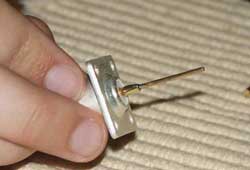
Next thing to do was to find the other bits we needed. We needed a female N-type connector, and also a bit of copper rod. We couldn't find copper, but assured that it would work by Froo's dad, we used brass instead. Here's a pic of the connector, bought after much hassle from a Dick Smith store in Osbourne Park, Perth. We were quite proud of our efforts at this stage so decided to relax with a beer.

We cut a bit of the brass rod off, and cut it down to size according to our reference article. Then we soldered the rod to the end stub of the connector, like this:
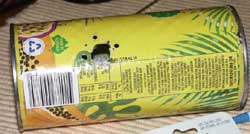
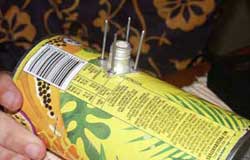
Golden. Next, we calculated where the connector needed to sit in the side of the can with a handy calculator that is also on the reference page. We measured the distance out, and drilled a hole (rather haphazardly) into the tin. We thought about a few ways to attach the connector to the tin, and decided that pop-rivets would be the best way to go. Mainly because they were handy, and I'd not used them before. See, everything happens for a reason. Here's the tin, after some surgery. We were quite proud of our efforts at this stage so decided to relax with a beer.
This is the assembly, with pop rivets in place and ready to go pop!
Due to the wonky nature of the connector on the tin (it didn't sit exactly square), it was a real effort to get the pop rivets in!
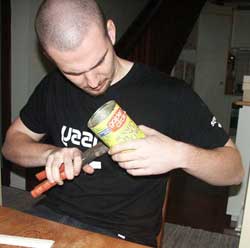 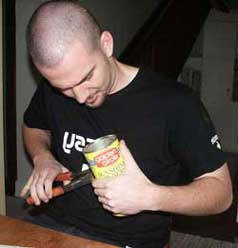
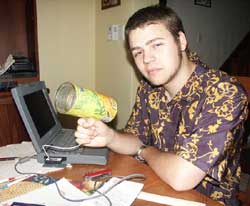
Finally, we (well, Froodogs) got them in (what, expect me to be able to type AND be able to use a pop rivet gun? Are you mad?). It looks a bit slapdash, but that connector is NOT coming off that tin! We were quite proud of our efforts at this stage so decided to relax with a beer. Here's the finished product, with Vindaloo showing it off (as well as his bulging muscles, extremely tasteful shirt and attractive facial adornment).
We did a little test at this point. Here's a pic of a little NetStumbler graph.
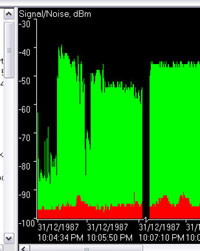
The first area is without the cantenna. It's quite obvious on the graph at the point I plugged it in :) As you can see, reception is improved drasticly. This was from an AP that wasn't too far away, and that wasn't moving. So, the real test would come out on the open road. Yes, humble reader, that's right. Wardriving.
Behold the Sprinter of Unyeilding.
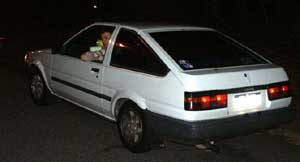
That's me, Vindaloo, hanging out the side. This car belongs to Froodogs, and it's a real little weapon. Jap 4A-GE, King + Koni suspension gear, a pair of new P6000's on the front and the bald old Kumhos that came with it on the back... I'm sure you get my drift.
Anyway, we jumped in, fired up the lappy, and it refused to work. Bugger. So it was back to Froodogs' house to fix the problem. Some beers and reinstalled PCMCIA services later, we were back on the road with all systems go.
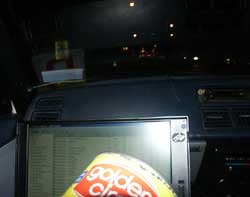
The co-driver's view :
Froodogs, the fearless driver :
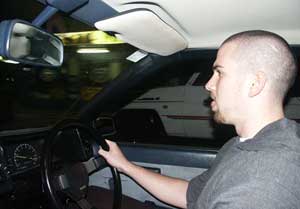
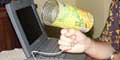
And finally, the cantenna in use :
We picked up around 6-8 times the number of APs when we used the cantenna, compared to just using the wireless NIC's internal antenna. Mission success! Around Perth's CBD, and a few surrounding suburbs, for example East Perth, Northbridge, and Nedlands, we picked up 148 (give or take) APs. We found these over the course of a couple of nights driving with the cantenna as part of the second World Wide War Drive.
The total cost of the cantenna was very little, compared to commercial antennae. $5.60 for the N type connector. The pop rivets and brass rod were both free (due to some scrounging, and also to aforementioned Froo's Dad, thanks muchly :) ). The solder was a couple of dollars for a roll, but I estimate we used 10 cents worth (if that). So, adding in $1.30 for the can, we reach a grand total of about $7. Not bad eh?
We were quite proud of our efforts at this stage so decided to relax with a beer.
So, in conclusion, making a cantenna was a very worthwhile exercise, and is recommended to anyone who wants an antenna on the cheap! There are heaps of guides out there, just have a look around. Our results show that you can brew something up that works great and is cheap. Now, go forth, and take control of the airwaves!
|
|
Advertisement:
All original content copyright James Rolfe.
All rights reserved. No reproduction allowed without written permission.
Interested in advertising on OCAU? Contact us for info.
|
|