I recently started playing around with Arduino and I've found myself quite addicted to these little projects. It's an inexpensive and fun way to learn electronics and device programming. This article will cover the process by which I got started, and will hopefully provide a quick introduction for other people who aren't sure where to begin. The world of Arduino is huge, and this article will only scratch the surface, but at the end I will provide a "where to from here" section with more links and info.
One night recently I was chatting on IRC about toys or kits that would be fun to explore with my kids over the school holidays, and to encourage their interest in technology and engineering. OCAU member Quadbox suggested the Sparkfun Inventor's Kit and, in a late-night impulse buy, I ordered one. More accurately, I ordered the slightly cheaper Special Edition which temporarily exists due to the normal plastic case not being available. At this point I wasn't really sure what I was getting into, but the general idea of a solderless electronics/programming kit sounded interesting. Soon enough I had the red cardboard box in hand.
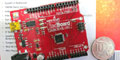
The core of this kit is the Arduino Uno. Arduino is an open-source hardware and software platform which started back in 2005. It's a good entry point for people wanting to learn about electronics and programming devices, but can be used for all kinds of real-world projects. There is an enormous user community and a huge amount of information online to help you learn how to use Arduino and build your projects. The Uno is a specific model of Arduino board, and is the board most people begin with. Other Arduino boards are available if you need more ports, or a smaller footprint, or more CPU power or memory, etc. To be strictly correct, the Sparkfun kit includes their "RedBoard", which is a clone of the original Arduino Uno.
Also included in the kit are a heap of other goodies, including a printed manual. I should note at this point that I am not exclusively recommending the Sparkfun kit. It seems fine, but there are many other options out there. Other companies like Adafruit, Freenove, the official Arduino.cc organisation and Australia's own Freetronics have their own well-documented kits, but you can also get grab-bags of goodies from places like eBay or AliExpress, or you can simply buy the specific individual bits you need for a particular project. There are many guides and videos on the net about projects ranging from trivially simple to very complex.
I do think a kit like the Sparkfun Inventor's Kit is a good place to start, because at first you don't really know what you need. Having a variety of goodies arrive in one box makes it easier to get experimenting. Be warned that you will almost certainly end up ordering more bits and bobs as you go along, because these little kits are quite addictive. Fortunately the bits and bobs are usually not very expensive.
There's too many bits included to list here - check the photos. The manual in particular is excellent. It takes you step by step from basic projects to more complex ones, with very clear diagrams and explanations of what to expect, what to do when things don't work, and what is being demonstrated by each project. My only complaint is that the book isn't ring-bound, which would let you rest it flat on a table while both your hands are busy building the projects.
The basic idea of the projects is that you connect the Arduino Uno to sensors, LEDs or other components, using plug-in wires on a breadboard - no soldering required. You then use your PC to upload a program to the Arduino Uno via USB, which tells it what to do with the components. For example, you could simply tell it to blink an LED connected to one of its ports, which is the first project in the book.
Each project in the Sparkfun manual has a program associated with it. You download them in an archive from their website and then you can upload them to the Arduino Uno. There is something very satisfying and addictive about seeing the project work, even if it's as simple as blinking an LED. If you're like me, you start tinkering immediately, making the LED flash faster or slower, or at a random value. What if I add a few more LEDs?
On the software side, the Arduino IDE is a pretty decent editor, with the usual features like syntax highlighting and quite verbose error messages. If you are familiar with C or C++ programming already you will feel right at home, but if not, the book and online guides will get you going soon enough. There's also a tonne of sample code out there to borrow from.
Generally what you do in the programs, or "sketches" as they're called, is monitor an input, decide what to do, then send a signal as output. For example the second project in the book has you reading the value from a potentiometer (a variable resistor), and using the value to control the brightness of an LED. Once you have a few projects under your belt, you start to combine them. What if the value of the light sensor is used to control the colour of the RGB LED? Or if the heat sensor controls the pitch of the tone coming from the speaker? It really feels like computing in its purest form. Input, processing, output.
If you remember, I originally got this kit as something to do with my kids. Will, my 10yo son, took to it very quickly. I will say that it's worth going through and installing the various USB drivers and so on beforehand, as that's not very interesting to kids. I also took the precaution of building the first project one evening by myself to make sure everything worked before getting the kids involved and repeating the build the next day. But very soon he had grasped the concept and was even editing the programs to see the result of changing delays etc. In fact on one day of the school holidays when he wasn't allowed to stare blankly at the TV or his phone, he took it upon himself to build the last project in the Sparkfun book, a "Simon Says" type game. In that game, an ever-growing sequence of sounds and LEDs light up, and you have to reply by pushing the correct colour buttons in the correct order. Once you get up to 5 or 6 steps in the sequence it becomes quite tricky to remember. Anyway, after he'd built it and uploaded the program he played the game for quite a while - partly because the game is genuinely quite fun, but also because he was marvelling at the fact he'd made it himself.
There is a lot to do in the SparkFun kit - 16 projects in all - but they're all fairly basic to teach you the fundamental concepts. However, there's a world of other components and project ideas out there. On the next page, we take a few steps beyond the basic kit.
All original content copyright James Rolfe.
All rights reserved. No reproduction allowed without written permission.
Interested in advertising on OCAU? Contact us for info.