|
|
Advertisement:
|
|
VIA Eden EPIA-M Case Mod |
|
Join the community - in the OCAU Forums!
|
Introduction and case preparation.
Review/mod motherboard and power supply kindly supplied by Fiona Gatt at VIA Arena. For technical details on the VIA "Eden" EPIA-M motherboard, please read Baker's original review.
VIA has recently released its new generation of low profile motherboards, based on the previous ITX platform. This time, theyve given it a massive kick in the pants by adding a DVD decoder chip and better sound output. The addition of the DVD decoder chip creates exciting possibilities for using the platform as a multimedia box, playing both DVDs and DivXs.
Whilst reviewing the motherboard - and with its tiny dimensions in mind - I thought it would be a novel idea to see how small a package I could fit all of the components into. A cool idea would be to build it in to a retro style nostalgic package in the form of an obsolete gaming console. What I have done is taken what was a premier entertainment system in its time, and put into it what will allow it to be a premier entertainment system for this time.
The intended use for the system is to play old style console games via emulation on a modern operating system and to also utilise its DVD, DivX and MP3 playing capabilities.
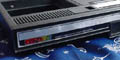
I picked up an old Colecovision gaming console system from a local garage sale for $10. I judged that my systems components should "just" fit into the casing ("just" proved to be the operative word).
The Colecovision games console was released in 1982. The console quickly became the most popular games console of the time beating the Atari VCS/2600 and Commodores.
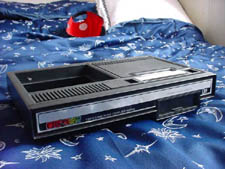
The transplant recipient a Colecovision gaming console
Transplanted Components
VIA Eden EPIA-M motherboard, with onboard TV-OUT, 6 channel sound, 10x100 LAN, 933mhz CPU
256mb PC-2100 Micron DDR-RAM
Seasonic SS-140NQ low profile 140W PSU
Toshiba MK4310MAT 4.3 gig laptop HDD
Koreadvs DSL-600A (Taken out of a dead Hiteker standalone DVD Player)
Construction
To start the modification we had to strip out all of the electronic components of the Colecovision case. This was achieved very easily only a few screws needed to be removed in order to rip out the original componentry, then we had to remove every little plastic standoff that was in the case and hack out all of the protruding reinforcement webbing. This was achieved using a Dremel rotary tool.
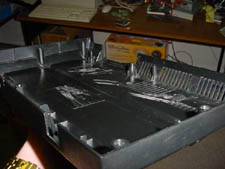
With some of the standoffs removed.
Determining where the components were to be located and fixed was the hardest part. We ended up deciding on the following area for the motherboard:
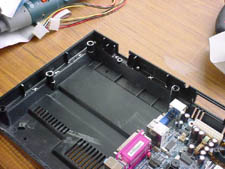
The white Xs mark where the motherboard will sit and what original standoffs have to be removed.
Unfortunately in order for the motherboard to fit it meant that the bucket for the controller pads located on the upper half of the casing also had to be removed.
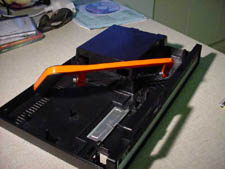
Removing the bucket.
A slot had to be marked out and cut out on the side of the case for the motherboard I/O plate to fit in. We then secured the snug fitting I/O plate with some hot glue.
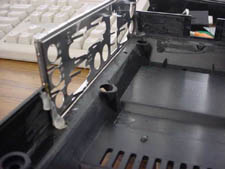
I/O glued in.
To mount the motherboard, we simply drilled new mounting holes on the shelf of the lower case half to correspond with the motherboard mounting holes. We then glued one of the retained original mountings in the bottom right hand corner for additional support. This worked really well - the board does not move at all.
The HDD was mounted in the right hand side of the case; it was thin enough and also ran cool enough to allow it to sit underneath where the DVD-ROM was to be located. It was simply secured by drilling the appropriate holes in the bottom of the casing. A laptop ATA-44 to ATA-33 adapter was used to allow it to plug into a standard motherboard interface.
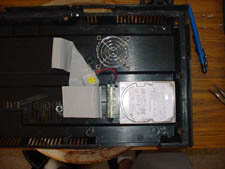
The laptop HDD mounting, with the adapter and cable in place.
|
|
Advertisement:
All original content copyright James Rolfe.
All rights reserved. No reproduction allowed without written permission.
Interested in advertising on OCAU? Contact us for info.
|
|