|
|
Advertisement:
|
|
Lian Li C-01 Faceplate Cover |
|
Join the community - in the OCAU Forums!
|
Introduction, Installation
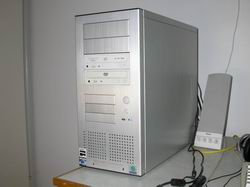
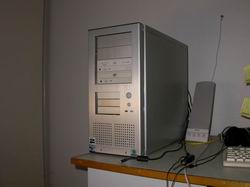
After having forked out megabucks for your shiny new Lian Li aluminium case, you probably came to the same conclusion I did when I'd stuck my DVD and CD-ROM drives in.
Blegh!
Well, that was the first thing that came to mind for me. I felt that the beige rectangles of my CD drives ruined the otherwise appealing look of the PC-65's brushed aluminium.
Some people have gone to the extent of chopping up their blanking plates, but the idea of getting creative with some tools on a part which I couldn't buy a replacement for wasn't really one that appealed to me. I had seen the stick-on covers that Lian Li have been selling, but they're only for certain models of drive. I've owned 3 CD/DVD drives since buying my PC-65, and funnily enough none of those drives had a matching stick-on cover.
The stick-on covers aren't really an ideal solution either. As highlighted in Dan's review, the stick-on covers have this weird problem where it looks like someone's laced the edges with something bright. This tends to give a highlighted appearance from particular angles - unfortunately the same angles that you'll most likely see them from and be bothered by them from. So they end up looking kind of cheap.
That's where these puppies step in.
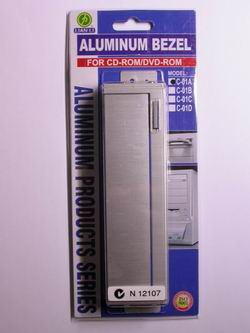
The Lian Li C-01 Faceplate Covers don't require you to hack or snip or, if you're really lucky, even drill. The instructions on the back of the packet are laced with a little bit of Engrish but are still straightforward. The face is fairly generic - the cover relies on your eject button being somewhere behind its own button on the bottom right. Then again, I'm yet to see a drive with an eject button that isn't in that general area.
The faceplate's button is rather large on the inside - so pressing that button is going to have an excellent chance of hitting your actual drive's button. The button and the parts on the sides that provide the hinges for the flap are the only plastic parts.
How this little addon manages to stay generic is via the spring-loaded flap on the front - the size of the flap should be large enough for most drives available - the tray door would have to be quite low to cause issues. Also, the triangular design of the rear of the flap means that it's highly unlikely to snag on your drive's tray. Just as with 8cm CDs and those annoying gimmick business card CDs, you can forget getting one of these faceplates if you have a slot-load drive. Unless you like the idea of having to pull the flap down manually, and also like comparing the strength of the spring on the flap vs the strength of the eject mechanism on your drive. Kind of like headbutting a door open.
Installation
I think it'd be awfully difficult to mess this one up. First pull the front frame away from the case and put it aside out of the way. You'll notice (with most Lian Li cases) that there are holes beside each drive bay.
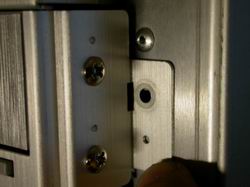
If you don't have these, then unfortunately you're going to have to get creative with a drill. Preferably not -too- creative. Drilling holes that line up is most preferable.
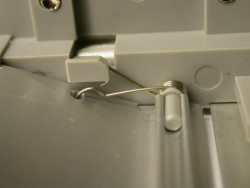
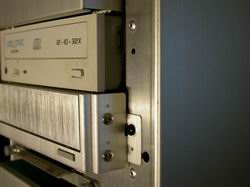
With the holes sighted, you'll want to move your DVD/CD-ROM drive back a bit. So here it's just a simple matter of loosening the screws holding the drive in and sliding the drive back. Don't worry about making the cover a tight fit against the drive, as with some drives the action of the tray pushing the flap down will make the bottom of the flap hit the eject button and make the tray go straight back in.
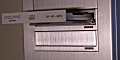
You'll most likely recognise the plastic button things as used in the rest of the case. These ones are identical but smaller in size to go with the smaller hole. It's just a matter of pressing them in. Once done, you should end up with something like this:

Now that the face is in place, press the eject button. We're doing this to make sure that when the tray comes out and pushes the flap down, that the bottom of the flap doesn't hit a button and make the tray withdraw. Having the drive a bit further back than necessary doesn't hurt. Once that's done, secure the drive in place and you're done. I found that I didn't need the extra screws and sticky bit of foam for the button that was included with the pack. You've probably noticed that the finish isn't an exact match for the case. More on this later on.
|
|
Advertisement:
All original content copyright James Rolfe.
All rights reserved. No reproduction allowed without written permission.
Interested in advertising on OCAU? Contact us for info.
|
|