|
|
Advertisement:
|
|
COMSCOM Think Tank Minitower Case |
|
Join the community - in the OCAU Forums!
|
More Details, Installation
Taking the side panels off is easy - just undo the thumbscrews, slide slightly backwards, lift up and off. Once you've done that you can remove the front by squeezing some plastic tabs on either side.
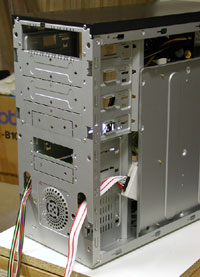
Note that the motherboard tray isn't removable. There is a front fan mount, but no fan is provided. To install the fan, you slide it from the right side of the case across the front and it is caught by a little metal flange that holds it in place while you secure it using two supplied screws through the front of the case.
Removing the front completely is a little tricky because of the cables, but they are jumpered onto the PCB at the front so they can be disconnected and the front removed. Those PCBs control the side-mounted front ports and the front "Panoramic Panel". The holes in the front of the chassis that the cables go through are rounded to stop them damaging the cables, which is a nice touch. You can see the cutout in the bottom of the plastic fascia - that's pretty much the only opening where intake air can be drawn in by a front-mounted fan. There's no dust filter and drawing directly up from the bottom of the case can get a little dusty.
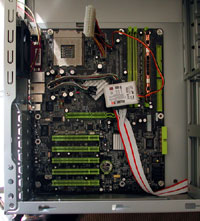
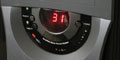
Here we see DFI's LanParty NFII Ultra B installed in the case. Note that the Hub Box is powered by a passthrough from the motherboard ATX power connector. I don't think I've ever seen something borrow power from this connector before.
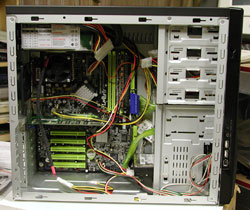
Finally we have the system installed. I only have beige-faced CDROM drives, so I tested installing one with no problems but removed it for the photos so it didn't spoil the dark grey looks of this case. Interference between CDROM drives and the motherboard is something to keep an eye on, but no more so than any other minitower. The hard drives overlap the motherboard slightly due to the fan-mounting space in front of them, but they are still a fair way away from the motherboard so that shouldn't be a concern.
There were no major problems - a removable motherboard tray would have made life a little easier, but it was simple enough to build the PC without it. You'll need to remove both sides of the case if you want to secure your hard drives or CDROM/DVD drives on both sides because drive rails aren't used. Like any minitower, you will find it fiddly to remove some CPU coolers while the motherboard is installed in the case due to the proximity of the power supply. However, there's enough room between the drive bays and the edge of the motherboard that side-mounted IDE or floppy-drive connectors wouldn't be annoying.
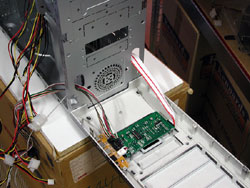
The Hub Box comes into play as you build the PC. This device has three connectors for the three provided thermal probes, as well as two 3-pin fan connectors. It also has a 20-pin ribbon cable going to the front panel of the case, as well as the Power and HDD LED's, the reset and power switches and of course the connection to the ATX motherboard power passthrough cable mentioned earlier. The downside is that all these cables add together to a bit of a mess. This is compounded by the short length of the cable on the included 80mm exhaust fan. You end up with cables running across the middle of your motherboard, along the back of the video card etc, and the Hub Box itself either dangles freely or has to be wedged away behind the drive bay somewhere. Installing the cables themselves into the Hub Box is also fiddly, requiring quite a bit of force for some connectors.
I think a better idea for the Hub Box would have been to have it fixed somewhere. Asetek's VapoChill PE is a good example - their ChillControl board is fixed to the side of the drive bays as seen here. You could have a similar but less fancy arrangement in the Think Tank simply by providing longer cables and a couple of nylon cable ties. This would make the insides of the case a lot neater and easier to manage.
|
|
Advertisement:
All original content copyright James Rolfe.
All rights reserved. No reproduction allowed without written permission.
Interested in advertising on OCAU? Contact us for info.
|

|