Internals, Installing Motherboard
Inside the Case:
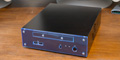
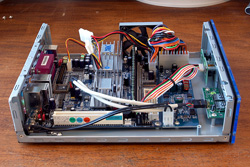
Opening the Procase 3688, we can see that it's a fairly simple two-level design. The bottom level holds the motherboard and DC/DC power supply, with an optical drive and HDD sitting in a tray on top. The case is steel, not aluminium, but weight is not an issue with a case of this small size. Build quality is good, with no hand-shredding sharp edges or ill-fitting joins.
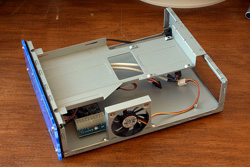
With the drive tray removed, we can see the DC/DC power supply, as well as the front panel connections. The DC/DC power supply PCB takes a 12V input from the external transformer and converts it into the various voltages required by the motherboard, as well as providing voltage regulation. It uses a standard ATX connection to transfer power to the motherboard. The black wire at the top of the picture is the 12V input from the socket at the back of the case.
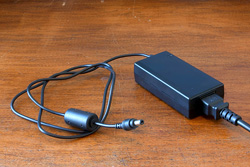
The external powerbrick transformer is fairly small by powerbrick standards, similar to a small laptop power supply, and rated at a mere 54W output at 12V, giving an indication of the low power draw of mini-ITX motherboards. During testing, the powerbrick remained fairly cool, and the connection into the case itself is solid and secure. The cables are fairly long, easily long enough to leave the powerbrick on the floor with the case on a desk. The powerbrick also has a green "power on" LED.
Installing the Motherboard:
Time to shoehorn the CL6000E motherboard into the case.
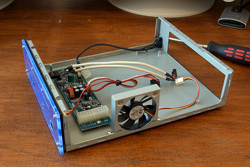
The motherboard was a tight fit between the back of the case and the DC/DC power supply. It made life easier to remove the power supply first, fit the motherboard and then reinstall the power supply. The PSU was easy enough to remove, held in place by two screws.
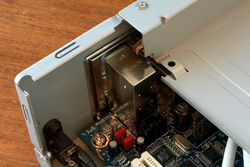
As can be seen in the photo above, the exhaust fan isn't actually next to the heatsinks on the CL6000E motherboard. Presumably this is to also draw some air across the memory and DC/DC power supply. I'd think that once the case cover was installed the fan would still draw sufficient air across the heatsinks as well. I can't help thinking it would have been better positioned a little closer to the heatsinks though.
The CL6000E motherboard has one PCI expansion slot, but the Procase 3688 doesn't allow the use of any expansion cards. This is another reason why the case can be so small, and fine for my application, as since the CL6000E has dual onboard LAN, I didn't need to use any cards anyway. Keep in mind though, if you need to use an expansion card with your mini-ITX motherboard, the Procase 3688 is not for you.
Once the motherboard was installed and front panel connectors, umm, connected, I started to install the drive tray. This is when I encountered a small problem. I'm not sure if it's specific to the CL6000E motherboard, but when installed, the back of the drive tray pressed against the back panel block containing the audio jacks. When installed, the audio jack block was pushed perhaps half a millimetre to the side, and remained under tension, which probably would have been OK, but I wasn't happy with that, which meant only one thing. Dremel time!
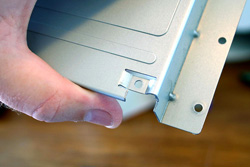 
A couple of small incisions, a nip and tuck here and there and the drive tray was modified such that it no longer touched the audio jack block. Much better! Unfortunately I don't have a pre-dremmeled photo - when there's dremelling to be done, I get very focused, but hopefully you get the idea. :)
|