|
|
Advertisement:
|
|
Yeou Chih YCC-63F1 Server Case |
|
Join the community - in the OCAU Forums!
|
Features Continued
Removing the motherboard tray is a simple matter of undoing the four thumbscrews at the back of the PC and another inside. Then it slides backwards and out, taking the 120mm fan and plastic duct with it. At the front of the tray is a small plastic stand for full-length PCI cards. This stand also contains the small piezo-style case speaker.
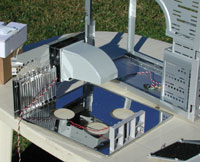
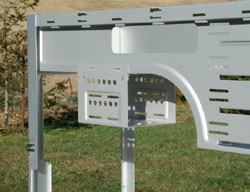
Note the width of the motherboard tray - large enough for Extended ATX motherboards such as dual or quad-CPU server motherboards with a lot of onboard features. The Tyan Thunder K7X Pro used in OCAU's database server pie, for example, will not fit in most cases because it is too wide with its dual CPUs, dual onboard LAN and dual onboard U320 SCSI. It would fit fine in this ATX Extended-compatible case. Of course, if you're using a normal ATX motherboard it will fit fine, with the bonus of more space between the motherboard and drive cages.

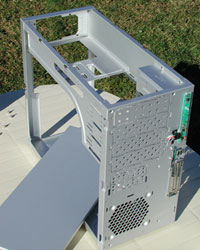
Shown above are the two removable drive cages. They continue the tool-free approach of this case, secured by black plastic pop-tabs, sliding backwards and out. The lower bays are cooled by the front 120mm intake fan.
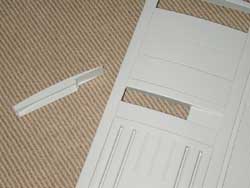
The design of the front panel makes it look like the 3.5" slots are too wide for a floppy drive. However, they've got a cutaway section so the right-sized hole is revealed when you remove the cover.
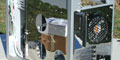
Without using tools at all you can strip the chassis down considerably. Even the top panel comes off, making it easier to install a power supply. Being able to rotate the PSU upwards gives you room for installing a CPU cooler on motherboards where the socket is close to the top edge. You could also take the lid away and cut a top blowhole in it, without having to strip the entire PC to avoid metal shavings getting into your components.
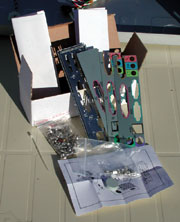
Included with the case are a few additional backplate covers, which are only marginally useful given virtually every motherboard comes with its own one nowadays. You also get a healthy serving of assorted screws and standoffs, two sheets of instructions and four castor wheels. There's a small separate kit containing a rubber pad, which according to the instructions is meant to go between the motherboard and the tray, presumably to support the board when installing a CPU cooler. Again, a bit of a strange inclusion and something I haven't seen elsewhere, but handy enough I suppose.
 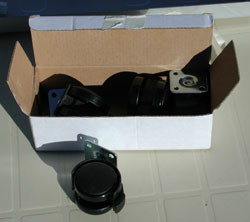
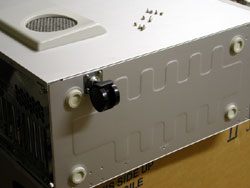
The case does come with four rubber feet pre-installed, but if you require more mobility for what could be quite a heavy case when fully populated, the wheels are a nice inclusion. Two of them are the locking kind, to stop it rolling off your desk when nudged. You install the castor wheels with 4 screws each - I put the locking ones at the front for easy access to the lock tab.
The final inclusion is an optional drive cage that hangs from the rails below the PSU area. You need to remove the CPU duct to use this additional drive cage. It slides into place and gives you two additional 3.5" bays for hard drives.
|
|
Advertisement:
All original content copyright James Rolfe.
All rights reserved. No reproduction allowed without written permission.
Interested in advertising on OCAU? Contact us for info.
|

|