|
|
Advertisement:
|
|
Inexpensive Greener File-Server Guide |
|
Join the community - in the OCAU Forums!
|
The PC Build
The PC Build & Guide
This build is basically a bolt together and run affair. So I wont be focusing on the nitty gritty of where each screw goes. Here is a list of the hardware I am using for this build:- Fractal Design Array R2 NAS Case
- Gigabyte GA-D525TUD Motherboard
- 2x Kingston 2GB DDR3 Memory sticks
- 1x Kingston 2.5 SSD
- 6x Western Digital 2TB WD20EARS Hard Drives
- 1x Addonics SATA Multiplier
- Optional (TV tuner card)
Software I will be using for this build:- Microsoft Windows Vista Ultimate
- (Optional)DVBLogic TVSource and Network Pack
- Addonics Raid Software
Additional hardware that will be needed:- USB CD-ROM drive to install Windows from
- Phillips head screw driver
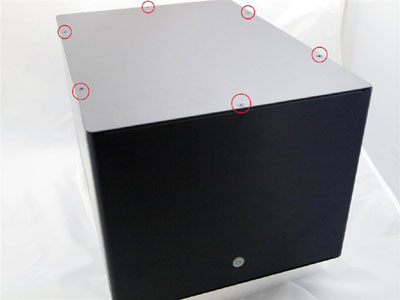
Lets start building. Get your Fractal Design case and remove the top 6 screws as shown below:
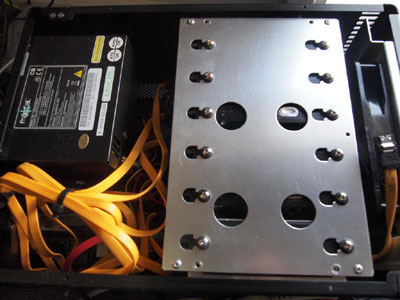
Remove the power supply by undoing the 4 screws on the back:

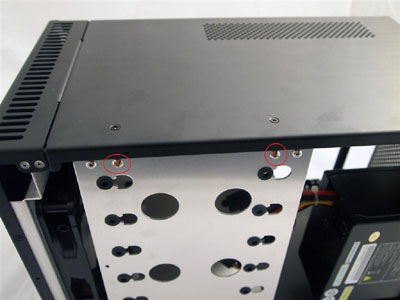
Undo the screws on both side of the cage to allow removal of the cage:
Install the motherboard IO plate in the hole on the back of the case; now screw the motherboard down to the mounts of the case:
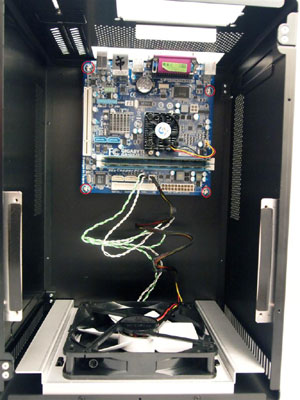
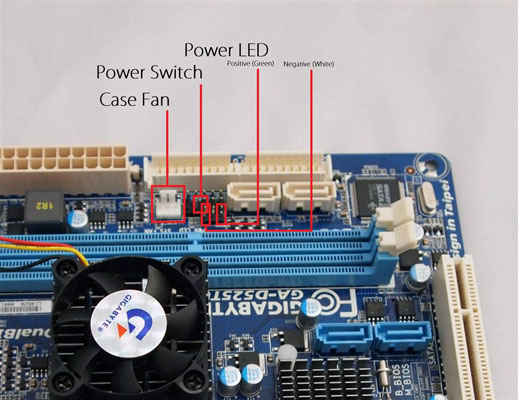
While we are in here with all this open, plug the power switch, led and fan in. Here is a diagram of where it all goes.
Once we're finished with this we can put the power supply back in. Next step is to install the hard drives.
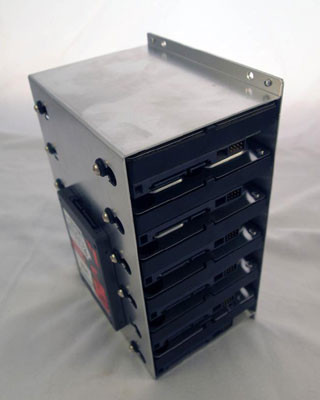
If you have an SSD you wish to use, install this first on the bottom of the caddy. In my case I have six drives but if you only have four, fill up the centre four spaces in the caddy. This will ensure good airflow over the four drives. Install a molex to SATA power connector to the SSD, and plug in the SATA cable for the SSD. The molex to SATA power adapter is needed to help the power supply reach the SSD and all hard drives.

Get your Addonics SATA multiplier out of its box. Plug in the six SATA connectors (number and label them if you wish) and power adapter, Connect the top port to the motherboard. On the case remove the outermost expansion port and fasten the SATA multiplier there. The multiplier will be a very snug fit and could benefit from some 90 degree SATA cables. If you are not planning on installing a tuner in the case it will be easier to plug the multiplier into the other PCI slot. Plug the power adapter included in the Addonics kit into the molex plug on the power supply. Keep the other molex end of this adapter handy to plug into the SSD power adapter. Plug another SATA cable into the motherboard and to one of the six drives as you are only able to RAID five of the drives with the Addonics card.
Before we put the drive cage back in its a good idea to install the TV card if youre planning on using one.
Now place the drive cage into the case pushing it towards the fan to give you some work space. Plug in the SATA power and then the data cables. When you have done that move it towards the back and screw it in. Screw the lid on and we're good to boot it up.
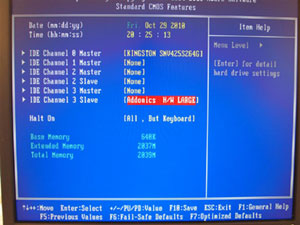
When the PC boots you can enter the bios and you should see the Addonics device showing as a single drive - if not, you might want to recheck the cable connections. I wont go into the extreme details of installing Windows; just pop the Vista CD in the drive and let it boot and install by following the bouncing ball. Once installed just load up any drivers needed - I let Windows find the correct drivers online.

First thing I install the JMB393 RAID manager to allow me to configure the RAID. You can find this application on the CD shipped with the device but I find its easier to download it off the Addonics website. Once installed open the software and click on the bottom button on the left that will allow you access to the RAID config.
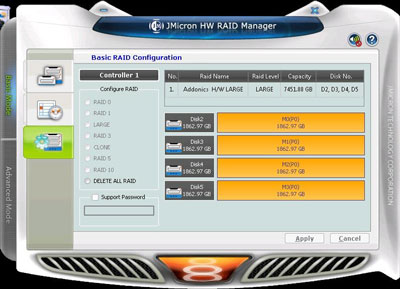
If the device has automatically created a RAID array select DELETE ALL RAID then recreate the raid setup you want; in my case I want a RAID5. Once created you can open Device manager by hitting the windows key + pause/break, select disk management and follow the onscreen popup up to initialise the drive as GPT partition. Right click on the unallocated space and choose New Simple Volume. Follow the wizard changing what you want (quick format if you dont want to wait for hours) and once it is finished your drive is created and presented.
I think were ready to start sharing and using that new RAID setup. The first thing we want to do is turn File Sharing on and turn Simple file sharing off.
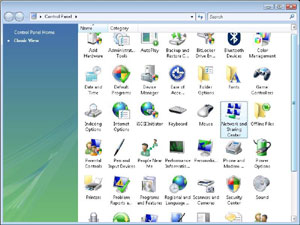
So open control panel in classic view and open the Network and Sharing Centre.
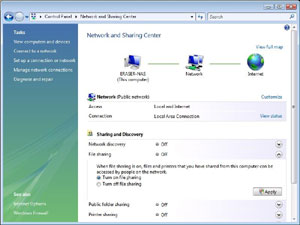
Click the down arrow on File sharing and select the radio button Turn on file sharing and Apply. I am not worried about network security inside my home - if you are you can ignore this step, but you will need to make a new user for each user to login to access file shares. Click the down arrow next to Password protected sharing and select the radio button to turn password protected sharing off and Apply. Re-open Control panel and hit the ALT key. Choose Tools -> Folder options
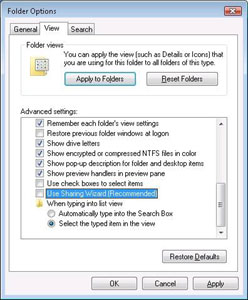
Click the View tab. Scroll down to the bottom and de-select Use Sharing Wizard, click apply. Now were on the home stretch. Right click on the drive or a folder under the drive and select share.
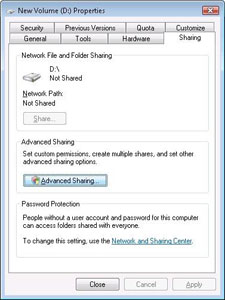
Select Advanced Sharing
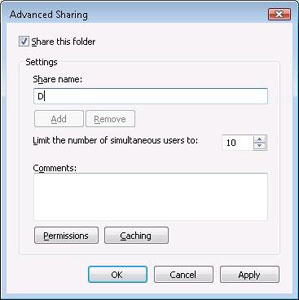
Tick the tick box share this folder. Give the share a name, then click Permissions. As I have previously said Im not too worried about security on my internal home network so I will be granting Everybody access to the server, but if you created individual user account this is where you would put them.
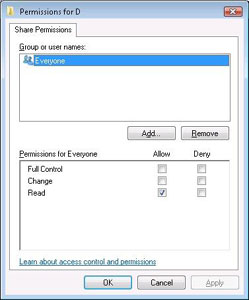
Click on Everyone and click the Tick box to the right of Full Control and below Allow. Click Ok, Ok. The folder should now be shared. Hopefully you know what you named the new server. If you dont, right click on Computer and select properties. There you should see the computer name. If it is something you will never remember click Change Settings and change it.
Now jump on your other PC, open My Computer/Computer, click Map network Drive, choose a drive letter and under folder type \\computername\sharename\ using the details you set up on the server. Hopefully it should succeed and open your new network drive. If it errors it could be because you need to enable file sharing on your PC much like we did on the server.
|
|
Advertisement:
All original content copyright James Rolfe.
All rights reserved. No reproduction allowed without written permission.
Interested in advertising on OCAU? Contact us for info.
|

|