|
|
Advertisement:
|
|
Senfu WaterCooling Bundle |
|
Join the community - in the OCAU Forums!
|
Introduction, Specs, Assembly
Why WaterCool?
Skymaster's WaterCooling Excuse:
There is a bit of a story behind why I got watercooling. One day I'm happily doing something on my cormputer, and out of interest I happened to open my System Information Viewer. That was when my heart stopped. CPU Fan was at 0 RPM and CPU Temperature was at 92ºC. My first reaction was "Oh ____", and my second reaction was to dive under the desk and reef out the power cable, opening the side of the case and putting my trusty fan against the box on full speed. Thats the main reason why I decided for it. Also, my box was running very loud. With 4 Sunon fans pushing though a lot of air, and the Volcano 7 also making a lot of noise, I was starting to get sick of it. So it was definitely for something quieter.
Digital_Guardian's WaterCooling Excuse:
I have always liked to look good when it comes to my computer. And when Skymaster said he was getting watercooling, well, none of that. I had to do the same. I had also been browsing the PCDB and noticing people doing some quite high overclocking on P4's. That I wanted too. That was enough to convince myself I needed watercooling.
System Specs
Digital_Guardian:
Intel Pentium 4 Northwood 2.53GHz
Abit IT7-Max2v2 Motherboard
1.5GB PC2700 Ram
4x Seagate Barracuda 5- 120GB - Raid0
ASUS V8200 Deluxe (GeForce 3) 32MB
Sony 16x DVD Rom
Lite-On 52x52x24 Burner
Lian-Li PC75 Case
Skymaster:
AMD Athlon Thunderbird 1.33GHz
Gigabyte GA-7VRXP Motherboard
768MB PC2700 RAM
20GB Quantum Fireball
20GB Seagate Barracuda 3
120GB Western Digital 7200/8MB
X-Micro T4200 64MB (GF4 Ti4200)
Guillemot Cougar VE 32MB (TNT2M64 PCI)
A-Open CDROM 52x
HP 24x4x2 Burner
Chieftec DX-01 Case
Searching for the Right Kit
So off we went browsing the web for different kits and watercooling options. The prices seemed to be pretty much the same, but we stumbled across the "Senfu WaterCooling Bundle" from CoolPC.
This kit seemed to balance performance with price quite well. For AUD$365 you get the following:
- Senfu Water Block
- Senfu Reservoir
- Black Ice Prime Radiator
- Eheim 1048 Pump
- 3x 1m Lengths of spring hose
- Mounting brackets for P4 and Socket A/370 CPUs
- A reasonable amount of anti-slip padding
- Various spare screws, seals, plumbers tape
On top of this, you can upgrade the radiator to either a Black Ice 2 for $28 or a Black Ice Extreme for $50. So out came the credit cards and the kits were bought, myself with a Black Ice 2 radiator, and DG with a Black Ice Extreme. Shipped via TNT, it was delivered within 2 days of order confirmation (and a lot of hassling TNT on my part argh!). The following day we set out to install it.
WaterCooling 101
Basically, you hook it up in this order:
Pump -> Water block -> Radiator -> Reservoir -> Back to pump
The pump takes cool water out of the reservoir, and pushes it through the water block. This of course removes heat from the CPU and therefore you get warm water out. From there, the water is pumped into the radiator, which transfers the heat into the air. The radiator generally has fans blowing on it to cool it down, therefore cooling the water. This cooled water travels back to the reservoir, where it repeats the cycle. It basically allows you to have a greater cooling area with the radiator than what you would normally have with a standard heat sink & fan.
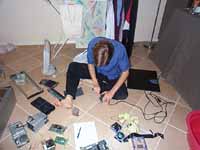
Removing the Unnecessary
The first thing I did before thinking about installation was to remove the existing problem. The 4 Sunon 80mm 6000RPM fans came out. That was the source of my noise and I didn't want to have any of that. Digital_Guardian left his in, but as they are controlled by a DigiDoc 5, he could easily enable or disable them as needed.
Installing the Kits
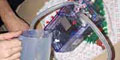
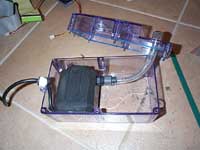
First up we installed the pump inside the reservoir, as detailed on the CoolPC website. This is where we struck out first problem. The suction side of the pump was almost flush against the side of the reservoir.
So, we sat back and thought how to attack the installation of the whole system and made a shopping list. Off to Bunnings we went and $20 later we had everything we needed and more. Lunch sounded good at that stage, Hungry Jacks was across the road ;-). Hacksawing back a little bit of the inlet of the pump fixed the problem. If you do the same, make sure you put some water down the outlet of the pump to flush out any shavings that might be inside.
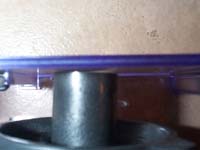
I'll warn you now, but we had a little leak after filling the system, where the power cord for the pump entered the reservoir.
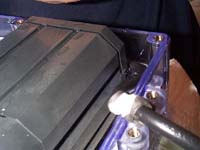
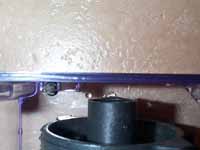
This is an example of how NOT to do the white plumbers tape. Make sure you apply LOTS. About 5mm each side of the foam as well as liberally putting it around it too. It'll save you many hassles later. There is one internal hose needed, not detailed too well in the instructions. Here's a shot of how I did it. Note again the lack of plumbers tape.
|
|
Advertisement:
All original content copyright James Rolfe.
All rights reserved. No reproduction allowed without written permission.
Interested in advertising on OCAU? Contact us for info.
|
|