|
|
Advertisement:
|
|
Antec SLK3700-BQE Black Quiet Super Mid Tower Case |
|
Join the community - in the OCAU Forums!
|
Case Details and Features
Complete product details for the SLK3700AMB can be found on Antecs website, and so can the product specifications. I suggest you also read Aggs P160 review, as the two cases do share a number of similar features.
The main feature of the SLK3700-BQE Black Quiet Super Mid Tower include:- Steel construction, black finish.
- 10 Drive Bays.
- 4x 5.25" external with drive rails.
- 2x 3.5" external in slide out bay.
- 4x 3.5" Internal. Hard drives are mounted sideways via individual drive trays with rubber grommets.
- Front and rear 120mm fan mounts, rear fan included.
- CD drive door.
- Removable and washable front intake filter.
- Thumbscrew and latch side panel.
- Clips to remove front bezel.
- 2x front USB ports.
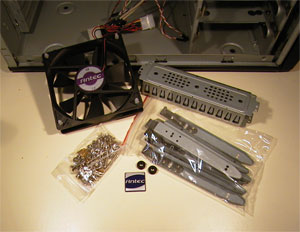
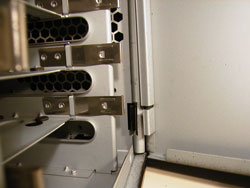
The case ships with a large assortment of screws and standoffs, 8 drive rails for mounting CD/DVD drives, 2 EMI shields, a case badge, some extra rubber grommets and the 120mm 38.94CFM 24.86dB ball bearing fan. The supplied fan intended to be installed in the rear fan mounts, and is fitted with the same soft bendy rubber clips that Agg noticed on the P160. To mount the fan, squeeze the clips through the mounting holes, and trim the ends if you want it to look a little neater. The soft rubber clips will then isolate the fan from the chassis, to reduce any noise or vibration. I did not trim the rubber clips as suggested in the manual, and I hope that with some care, the clips will allow the fan to be removed or repositioned as required when changing the internal or cooling components.
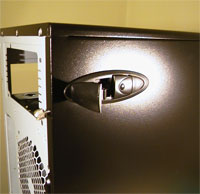
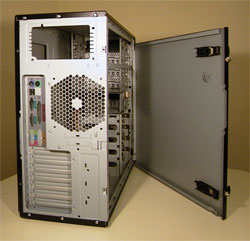
The side panel is secured by two thumbscrews which remain attached to the panel, and two latches on the face of the panel. Unscrew the thumbscrews, press the latch releases and pull the latch up to a 90-degreee position and the side will pop open. The side panel then folds open, pivoting along the rounded column at the leading edge of the case and can be removed after you open it by about 40-degrees. The other side panel also folds open, but is simply secured with 2 screws much like any other case panel.
The front bezel is released by pressing the two, mostly hidden, catches at the bottom sides of the front panel. Then you pull the bottom out and slip the bezel down and pull it off, the slight downward movement that is required did confuse me for a little bit. A well thought out piece of design allows the front bezel catch to be depressed only after the main side panel has been removed. The removable and washable air intake filter is attached to the front bezel, directly under the row of 7 oval protrusions (each with the bottom cut out to allow air flow) on the front of the case.
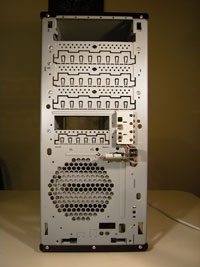
Interestingly the honey-combed air intake vent at the front of the chassis is indented inward. This means that the front intake fan, (if fitted, the manual suggests several times that the front fan should only be fitted if required, given that it will add to the noise levels) is attached to the front of the chassis and then covered when the bezel is put back in place. Each of the screw holes used to mount the front fan is threaded, and long screws are provided. However, I expect that Ill end up cutting out the honey-comb metal vents and using some grommets or something similar to isolate the front fan from the case when I install it.
There are no wires that attach to the front bezel, all the switches and LEDs are attached to the chassis in a little plastic box, so removing it is very easy. The two front mount USB ports and their small PCB sit just under the switch and LED box, and a little care is needed when attaching the front bezel to ensure you align the hole for the USB ports correctly. The little black dot on the bottom right hand side on the front of the chassis (in line with the lower fan screw holes) is the PC speaker.
|
|
Advertisement:
All original content copyright James Rolfe.
All rights reserved. No reproduction allowed without written permission.
Interested in advertising on OCAU? Contact us for info.
|

|