|
|
Advertisement:
|
|
Yeou Chih YCC-63F1 Server Case |
|
Join the community - in the OCAU Forums!
|
Introduction, Features
Today on the test bench we have a new case from YCC in Taiwan. When designing the YCC-63F1, YCC have taken a different approach to the last few cases we've looked at. This rather large case is aimed it at the small server or workstation market, rather than the enthusiast, and as a result it's not going to win any awards for style. However, with a removable motherboard tray, three 120mm fans included, room for four 5.25 drives, two exposed 3.5" bays and up to seven HDD bays, there's enough features to interest overclockers.
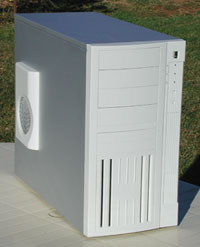 
The case has brushed-aluminium side panels and a chassis made of 1.5mm aluminium alloy with almost all edges rolled to avoid sharpness. Build quality is very good with a strong yet lightweight feel. The removable motherboard tray has a stainless mirror finish and thumbscrews are widely used throughout the case. The beige plastic front panel is unexciting, but again, in line with this case's intended market.
One fairly odd feature is the plastic surround for a ventilation hole on the left side panel. We'll look at that in more detail later. Some other interesting features are found on the front panel.
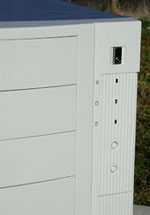
The power button, power LED, two hard drive LEDs, a reset button and another momentary-contact button are located at the top right of the front panel. The purpose of the lower button, simply marked SW3, is unclear, and as far as I can tell, there doesn't even seem to be a corresponding lead for it inside the case. It's difficult to tell, because the switches, LEDs and their connecting leads all go via a PCB behind the front panel.
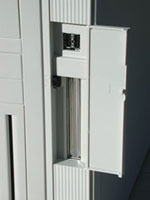
Continuing down the front of the case, below the buttons and LEDs, is a push-open door. This opens to reveal two front-mounted USB ports and... a PCI slot cover? Obviously this isn't intended to house an actual PCI card, but if you have a device that has extra connectors running to a second slot cover, you can mount it here for access via the front of the case. It's an interesting idea that I haven't seen used elsewhere.
ABIT's IC7 motherboard comes with a PCI slot cover with two USB ports and two FireWire ports - certainly a handy thing to have access to via the front of your case. However, ABIT expect it to be used from the motherboard connectors to a normal rear PCI slot space, and the cable supplied simply isn't long enough to reach right to the front of this very deep case.
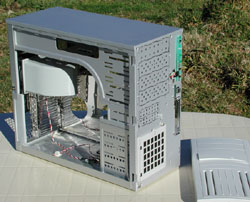 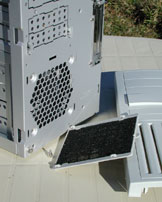
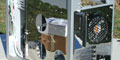
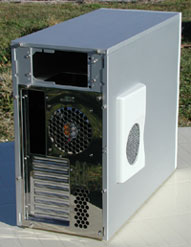
Thumbscrews make removing the sides a simple process, and the front is held on with the usual plastic clips on either side. The front can be removed entirely because no cables are attached to it, which is handy. There's a removable dust filter in front of the 120mm intake fan. In fact, that square section in the front panel is removable - perhaps there are other designs available. At the rear of the case another 120mm fan is provided, with a plastic shroud to duct hot CPU fan exhaust from the case. This duct is removable if your CPU cooler is not positioned close to it, but if you did use it, I imagine you'd get good results from orienting the fan to blow up from the cooler into the duct.
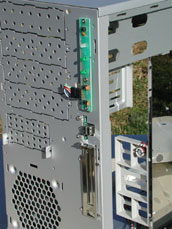 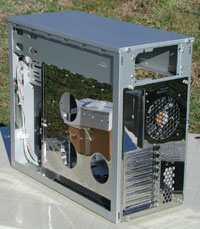 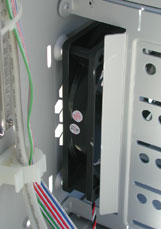
The picture on the left shows the PCB that controls the case's various buttons and LEDs, which is usually hidden behind the front cover. We also see here the PCI slot cover and mounting system for the front-access panel. The middle picture shows that rear of the motherboard tray is as shiny as the front - those cardboard boxes are actually a reflection. The picture on the right shows how the front-mounted 120mm fan is is removed and installed, via the right side of the case. The front-panel cabling is kept extremely tidy via plastic clips as it routes around to the centre area of the case. It's also worth noting that the removable RF shields that block the drive bays can be secured back into place with screws, in case RF interference is a concern in your installation. There is also a tab on the back of the left side panel to secure it with a padlock that you provide.
|
|
Advertisement:
All original content copyright James Rolfe.
All rights reserved. No reproduction allowed without written permission.
Interested in advertising on OCAU? Contact us for info.
|

|