|
|
Advertisement:
|
|
Slug-Sanding How-To |
|
Join the community - in the OCAU Forums!
|
Introduction, Preparation
As is traditional, let me start off with a standard disclaimer. Slug sanding is getting into the "extreme overclocking" range of activities. Be aware that there is a chance of destroying your CPU by doing this. I provide this article for information and entertainment only - if you choose to sand your own CPU slugs, you do so AT YOUR OWN RISK. I can afford to lose a CPU or two in the course of experimentation and I accept that risk - that may not be true for you. Having said that, I have sanded 6 CPU's to full copper (I'll explain that later) and they all work fine still. However, READ THE ENTIRE ARTICLE BEFORE PROCEEDING. I have deliberately not included a "What you need" section to force you to read the whole thing first. Oh, and you are DEFINITELY voiding your warranty.
Right, that's kept the lawyers happy. Now - what the hell is slug sanding anyway? If you read hardware sites you will have encountered the term at some point. It's nothing too mystical, basically you sand the top of the CPU's casing so that it's nice and flat, so you get better thermal transfer to the heatsink. This makes your CPU's run cooler, and may help you achieve stability at higher speeds. You will notice the most improvement on CPU's that have very warped slugs - usually the corners are higher than the centre, so they "push" the core of the CPU, the bit that gets the hottest and needs the most cooling, away from the heatsink. Thermal paste can fill the gap, but having a flat slug is better - and a flat slug with paste on it is best of all. You may also want to consider sanding your heatsink - but we'll not be covering that today.
We'll only be looking at PPGA Celerons today. You can sand the Slot1 ones too, but apparently sanding PentiumII's and III's is a bad idea - we don't have any here, so I'm not sure why that is. Anyway, here's what the slug looks like before sanding:

The slug is the raised bit of silvery stuff in the middle. There's usually a strange little logo right in the centre of it. This logo also appears on the other side of the chip.. anyone know what it is? :) (UPDATE: It's a 2D barcode which contains all the info on the chip, batch number, S-code etc)
An important thing to keep in mind when sanding your slug is that you don't want to make it any worse than it currently is. So you need to have a very flat surface for sanding on - glass is ideal. I use a sheet of glass with sandpaper taped to the top of it, like so:

The big pile of Gatorade bottles is helpful but not required. :) Some people say you have to use Silicon Carbide sandpaper but when I asked for that at the local hardware store all I got was blank looks. The generic dark-grey wet/dry stuff worked fine for me (in the photos it looks brown because of the copper from the CPU's - when you buy it, it's all the same colour as the corners). I start with grade 280, then change to 600 to get it really flat, then to 1200 to polish to a nice shiny finish. You will still have scratches on the surface - you're never going to get to a true "mirror" finish, but you should be able to see your face reflected in it - it should be nice and shiny, and FLAT, by the time you finish.
Keep in mind that you are scraping little tiny peices of METAL off the cpu when you do this. So don't do it ANYWHERE NEAR your PC or anything else that might be damaged by tiny conductive particles. Do it somewhere where you can properly clean up afterwards, vacuum the whole area etc.
Before you start, you need to protect the CPU. You need to make sure you don't leave metal particles that could short out the pins when you put it back in the socket. The best way to avoid this is to never get them near the pins in the first place. Also, you need to protect it against static and against water if you're going to be wetsanding. You also want to be careful not to bend the pins - this is usually not catastrophic, but it's a pain in the neck to straighten them out properly if you bend them.
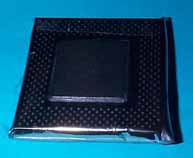
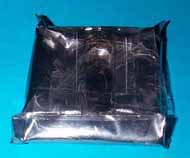
The best way to protect against all these things is to seal the CPU inside a static-proof bag while leaving the slug exposed. To do this, drop the CPU into the corner of an antistatic bag. Cut the bag away so you have a little pocket of bag around the chip. Leave about 1.5cm around it - it's better to leave too much than too little. Fold the open sides around and tape them on the bottom (the PIN side). So you now have the CPU completely sealed in a little antistatic pocket:
 
Left: top (slug side) - Right: bottom (pin side)
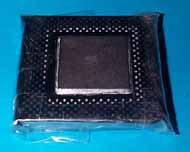
Now, to expose the slug so you can sand it. Cut around the slug with a stanley knife or similar - you want to actually expose a fair bit of the area around the slug - I usually leave about a 5mm gap. This is so you can stick the sides of the hole to the chip itself with sticky tape, to maintain the seal, while still exposing the slug. See the next pictures:
 
Left: cut open, before taping - Right: sealed with tape
Now! The CPU is in a mostly static-proof package, which is also waterproof and metal-shavings-proof. Also, there should now be a fair bit of stickytape and folded static bag protecting the pins on the bottom from your clumsy fingers during sanding. Now we're ready to sand. Allow yourself some time for this - you don't want to be rushing it. Say half an hour or so to make sure you do it properly.
|
|
Advertisement:
All original content copyright James Rolfe.
All rights reserved. No reproduction allowed without written permission.
Interested in advertising on OCAU? Contact us for info.
|

|


