|
|
Advertisement:
|
|
Five Large P4 Coolers |
|
Join the community - in the OCAU Forums!
|
Introduction, Thermaltake Silent Tower
Today on test we have five coolers for Intel's Pentium 4 CPUs. We'll be testing on a Socket478 platform, but many of these coolers can be used on Intel's newer LGA775 socket and even AMD CPU motherboards. In this first roundup we're looking at some of the largest coolers available - there will be a followup with some less imposing units.
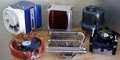
In this roundup we have, clockwise from top left above: Gigabyte's 3D Rocket, Cooler Master's Hyper 6, Thermaltake's Silent Tower, Zalman's CNPSB7000-Cu and Thermalright's XP-120. With the exception of the Zalman, they all feature heat-pipes, which are a more efficient way of spreading heat through a large radiator. Instead of letting the heat soak through the metal of the radiator itself, heat-pipes contain a fluid which carries the heat away from the plate in contact with the CPU and dissipates it into the radiator, where it's passed to the surrounding air.
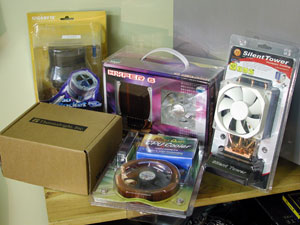
All coolers were provided by their respective manufacturers, except for the Zalman, which was provided by Plus Corporation. So, let's take a look at each unit in detail:
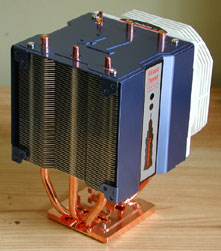
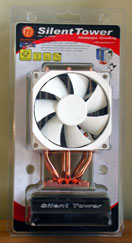
Thermaltake Silent Tower:
This is the largest unit on test today, featuring a copper base with a giant aluminium radiator section suspended above it by three U-shaped heatpipes. The copper base is quite thin above the CPU core, with a channel where the heatpipes flatten out and are secured with a mounting plate. They also seem to be soldered to the base block.
 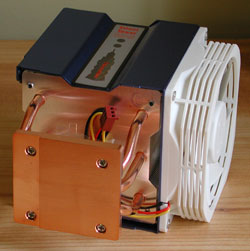
The radiator is enclosed in a blue aluminium shroud which has mounting screw-holes for 92mm or 80mm fans on the two open sides. There's a 92mm fan installed on one side by default, blowing inward across the densely-packed radiator fins. You could install another fan drawing air out the other side for more airflow. The included fan has a 3-pin connector for RPM monitoring but there is no fan-speed control included with this heatsink, unlike some of the others. The patterns on the side of the shroud seem to be purely decorative, but the grills on the side of the fan body are unusual - I assume they're to reduce fan noise.
 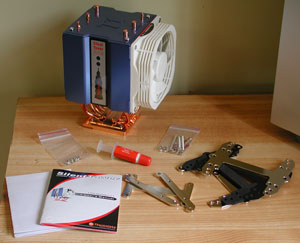
Included in the retail pack is the Silent Tower itself, various mounting plates and screws, a detailed photographic instruction manual, an extra instruction sheet with LGA775 installation instructions (which is odd, because they're also in the other manual) and a tube of Thermaltake-branded thermal paste. This cooler can be used on Socket478 or LGA775 as well as SocketA (provided they have the 4 mounting holes) and even A64 motherboards (with the two mounting holes). A custom backplate is used, so the first instruction is always "remove the motherboard from the case".
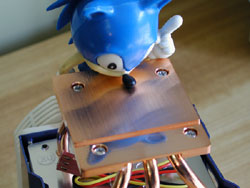
The surface that contacts with the CPU is finely machined. Through the course of this roundup we will employ Sonic the Heatsink-Testing Hedgehog to compare the relative finish of the heatsink-CPU contact area. Here we see his face reflected fairly well, but it's interesting to note that the raised part of the block, that doesn't contact the CPU, is more mirror-like than the part that does.
Installation:
Rising so directly away from the socket as it does, it seems unlikely this cooler would ever clash with any motherboard components. Unfortunately, the Silent Tower has the most fiddly mounting procedure in this roundup. It's a heavy unit, so the provided backplate is a must. Installing that backplate involves a sheet of insulation, four long screws, twelve tiny nuts and four paper washers. The instructions also neglect to make it clear how far you wind the screws in, which controls how much CPU clamping pressure there is. I absentmindedly wound them in for a while, then noticed I was bending the motherboard - it's easy to do and can damage your motherboard if you bend it too much. But if you leave the screws too loose, then thermal transfer will be inefficient and cooling performance will suffer. From the photos in the manual it seems they allow about 10mm of thread above the top mounting plate, so I aimed for that, which produced only the tiniest bend in the motherboard. I figure this is about the sweet spot between not enough clamping pressure and breaking the motherboard.
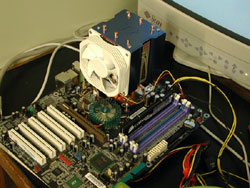 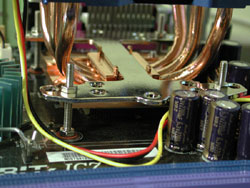
The orientation of the socket on this motherboard and the direction the fan blows on this cooler make things a little awkward. Either the fan is drawing air from the back of the video card, which during gaming can be very hot, or it's pulling air directly away from the bottom of the PC's power supply. Of the two I think blowing upwards is preferable, as this is not fighting a PSU intake fan and letting convection do a bit of work too. I actually didn't find much performance difference between directions when testing, but blowing down would not be possible in some configurations because the fan would be starved against the bottom of a PSU.
|
|
Advertisement:
All original content copyright James Rolfe.
All rights reserved. No reproduction allowed without written permission.
Interested in advertising on OCAU? Contact us for info.
|

|