|
|
|
|
|
Swiftech H20-220 Apex Ultra Watercooling Kit |
|
Join the community - in the OCAU Forums!
|
Setting Up
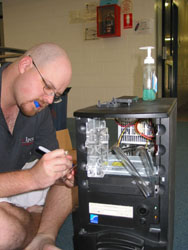
Most of the installation planning was straight forward: I would sit the reservoir in the 5.25" drive bay, with hoses coming down to the pump on the floor of the case, and to the waterblock sitting in the middle. Then, hoses would run from each of those items out the back of the case, to the radiator mounted on the outside.
I began the actual work stage by completely stripping the case of all components and the plastic front bezel, so I would be able to sit it on its front without damaging anything. I used a good quality 7/8" hole saw for the hose holes themselves and a boring old drill bit of the right size for the radiator supports.
A small note to remember if you've never drilled anything before: try to make a little dent in the metal where you want to drill, so that when you do drill, the bit won't slip away from where you want the hole to be. I made the little impressions with a holepunch and a hammer, although you can use an old drill bit in a pinch.
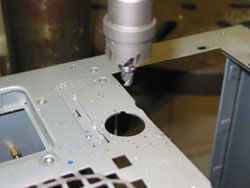
After drilling the two large hose holes and four support holes, I gave them a good filing with both thin round files and a flat file, to remove sharp edges. Sandpaper can be good here too. I then spent some time cleaning out the case with compressed air, a brush and a small hand vacuum cleaner. This isn't a step to skip, simply because a small piece of metal shaving can ruin your whole day (not to mention large sections of your computer). This is also why you should remove all the electronic bits from your case before carving into it.
Mounting the Radiator:
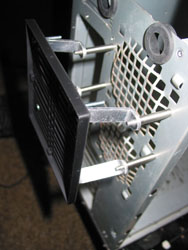
That incredibly large radiator and its incredibly large size was proving to be an incredibly large pain in the neck, when trying to figure out how exactly I was going to mount it. Of course, large radiators are good, in that they let you run nice big slow fans which are quiet. But you do need to allow quite a bit of room for them, and consider airflow through them. While Swiftech do include their "Radbox" radiator mounting system, which allows you free lateral movement and vertical movement in increments, it's not perfect. The other problem was the spacing of the radiator out from the back of the case itself: when I could find a good position for the radiator to be mounted, its close proximity to the case would have fouled cables coming from the back of the computer, most notably the video cables.
The kit does include some nylon spacers to help move the radiator out and away from the case backplate, but they're only 10mm long, which is close to useless in my opinion. 20-30mm would have been more useful and, although they did include some long screws in the bag of radiator-related gear, there were no long sleeves to keep it stable, so I couldn't figure out how they would help extend the radiator out from the case without causing stability and vibration issues.
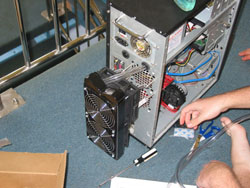
In the end, someone from the #excooling irc channel suggested some "bug leg" extenders, as well as some standard straight standoff legs, which together gave me more than enough room to fit cables properly without bending anything badly.
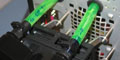
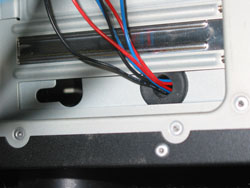
In that photo you can also see the nice rubber grommets Swiftech included to protect the hoses from being cut by the sharp metal of the case. I positioned those particular hoses below the power supply as I'd like to avoid any leaks running any coolant down onto the PSU. I know it's unlikely to suddenly spew coolant everywhere, but better safe than sparky.
One complaint I have about the radiator is the position of the hose barbs. Having the barbs that far apart reduces the options for where you can place the tube holes, even with flexible hosing, whereas positioning them closer in the middle would allow you to cut holes in tighter places.
Also, a small hole template would be helpful, as the instructions suggest using a small piece of hosing on the end of the barb to give you a rough idea where to cut. That does work, but it wastes an inch or two of hose, and the rest of the kit is so well thought out and professional, it just seems to be a strange thing to overlook. It's not a big deal, but it'd be nice, especially when you're trying to make things as neat as possible.
Agg edit: I remember when installing a bike rack that the manufacturer included a sheet of paper, on which was printed a template with appropriately sized and spaced holes as required for the metal tubing. This lets you line it all up on the bike before you start cutting the rear fairing without having to wrestle with the tubing itself. Something similar might be a cheap and useful inclusion in Swiftech's kit.
It's also worth noting how the two 120mm fans on the radiator, outside the case, are powered. They're connected either by two 3 pin-4 pin molex converters, or can be powered off the mobo by 3 pin extender cables. The cables enter your PC via a provided backplate with a grommet-protected hole for the cables to feed through.
Hose Measuring:
Some of you may remember from the interview with Defyant on our world-famous OCAU Podcasts the saying "Measure twice, cut once." With this motto in mind I set out to measure the correct hose lengths, then cut and mark the tubing so that the actual installation would be straight-forward and trouble-free.
As this kit features only the CPU waterblock, and no block for the VGA chip, I didn't have to worry too much about complicated hose runs. But there were a few things to keep in mind, namely:
The reservoir has to be the highest point in the cooling "circuit", to allow any air-bubbles to rise out of the coolant into the reservoir.The pump sucks coolant from the reservior, it doesn't pump it in - this makes it easier to fill the circuit for the first time and means there's less pressure on the reservoir.The bottom hole of the reservior is the "out" hose, and the top hole is the "in" hole. This allows air-bubbles to bleed out of the coolant correctly.
So, I began measuring out and cutting hosing, planning for the coolant to flow from the reservior to the pump, from the pump to the radiator, and from the radiator to the waterblock.
It took only a short amount of time to get the hosing lengths set and cut. I also marked each end of each hose length so I knew what had to go where when it came time for assembly.
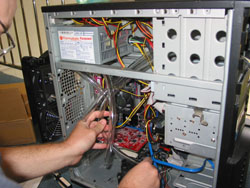
As you can see by the photos, I've already installed my shiny new (well, new to me anyway) Asus A8R32-MVP Deluxe, and AMD A64 3800+ CPU, both of which will have a supporting role in another review in the near future.

I ran this setup for a week or so in "air-cooled mode", with the stock heatsink and fan so we had a temperature baseline to compare against. But then came the time to add water...
|
|
Advertisement:
All original content copyright James Rolfe.
All rights reserved. No reproduction allowed without written permission.
Interested in advertising on OCAU? Contact us for info.
|

|