|
|
Advertisement:
|
|
DIY Subwoofer |
|
Join the community - in the OCAU Forums!
|
What you need
How to build a decent home theatre sealed active subwoofer for around $300AUD.
This is a guide to building a 100 litre enclosure for an active (powered) subwoofer that can be used on ANY home amplifier, computer sound card, or basically anything with a line out plug or speaker wire outlets. The finished box will be ready to hook up and use, the actual finish of the box, whether painted, carpeted, veneered, or whatever will be up to you. It is designed for a 12" woofer but I'm finding a 10" one works just fine.
Tools you'll need:
Tape measure.
Straight edge.
Drill, any variety.
Phillips head screwdriver.
Jigsaw (can be used for all cuts but specifically for the speaker cut).
Sander/sandpaper.
Pliers/wire strippers.
Compass.
Optional tools:
Cordless drill/screwdriver.
Mitre Saw.
Beltsander.
Soldering iron.
Hardware you will need to do the job:
Paper/Polycone Woofer.
Subwoofer amplifier.
MDF (Medium Density Fibreboard).
50mm Chipboard screws.
PVA glue.
Screws to suit your speaker (woofer).
Rubber feet/stands.
Parts I used for this project:
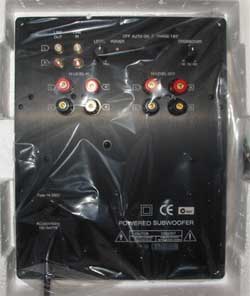
Jaycar 80w Sub amplifier - CAT:AA-0503 - $209
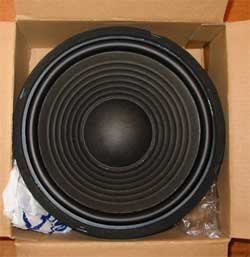
Jaycar 10" Paper Cone Woofer - CAT:CW-2119 - $35.95
3 sheets of 18mm MDF. 450mm wide x 1200mm long. These sheets can be bought straight 'off the rack' from any Bunnings store. $14.13 per sheet.
4x 55mm Rubber furniture feet. Available at Bunnings for $1.10 each.
Bag of 50, 50mm chipboard screws. Bunnings - approx $10.
PVA glue - We all have this lying around.
Dampening batts - I had some lying about and don't know what this costs.
Here's the amp module and Woofer I used.
These bits and pieces you can get cheaper if some are on sale and if you know how to haggle well, or if you have a trade discount at these stores. :)
Now, onto the work!
|
|
Advertisement:
All original content copyright James Rolfe.
All rights reserved. No reproduction allowed without written permission.
Interested in advertising on OCAU? Contact us for info.
|
|


