|
|
|
|
|
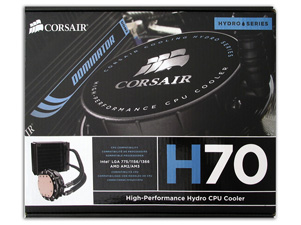
Corsair Hydro Series H70 CPU Cooler |
|
Join the community - in the OCAU Forums!
|
Introduction, Package, Features, Installation
Corsair has a long-respected history of memory module development and sales, but for the past couple of years it's been full steam ahead on expanding its range of specialities for PC users. One of the additions to the Corsair cooling line-up was the original Hydro H50 CPU cooler which provided a near plug-and-play water cooling system for your CPU. Now Corsair is back again with a revamped and beefed up solution called the Hydro H70. So without further ado, let's check out what's new and see how it performs compared to some air-cooled options!

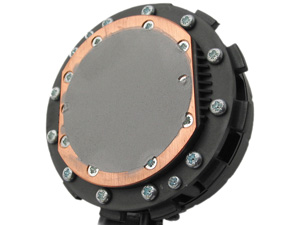
The Hydro H70 is a self-contained water-cooling loop with integrated pump and reservoir, and requires no maintenance for years, even exceeding its original 2 year warranty period. It features support for Intel LGA1366, LGA1156, LGA1155 and LGA775 sockets, as well as AMD's AM2, AM2+ and AM3. As you can see the unit is simple in concept, being a large radiator with inbuilt fans connected to a CPU waterblock with inbuilt pump.
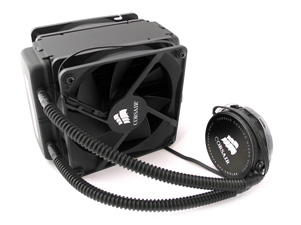 
In comparison to the previous Hydro H50, the H70 has cut its pump/waterblock height in half, measuring now only 30mm. However it has boosted heat dissipation with a 48mm-thick radiator, double the previous model, and the addition of a second fan. It still maintains a black finish and features proprietary hoses that virtually eliminate evaporation of water, and due to the decrease in hose length and pump height, it now includes rotating connectors on the pump side to help with varied mounting positions.
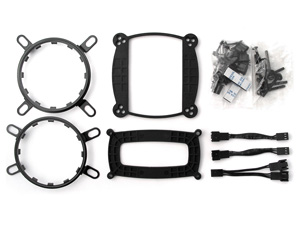
Inside the box we find the main radiator/pump unit, a pair of 120mm Corsair branded fans (with 22cm 3-pin cables), a set of manuals for each socket and two CPU mounting rings, one for AMD and the other for Intel CPUs. Alongside those you have the backplates for each CPU variant and assorted smaller parts for installation. Corsair also include a Y-adapter for the two fans, as well as a pair of adapters that reduce the voltage to each fan for quieter operation when required - these are 8cm in length.
So let's on to the installation! As with all new types of products it's seriously worth taking a moment to read the provided instructions. Corsair include a more detailed set of instructions than most manufacturers with a separate set of booklets listing all the required parts for each socket, while the larger manual goes over the general install instructions once you have your parts sorted.
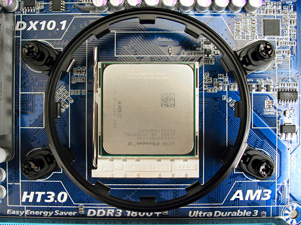
The first step of the installation focuses on getting the Corsair-provided back plate and the top ring lined up, then minimally turning in the four screws into the back-plate, just enough to get have it holding on with plenty of play. In the second step you attach the fans to the radiator and mount it to the case to free up one of your hands.
Then the final step involves inserting the CPU base/pump into the ring and twisting clockwise so the ring's notches line up with the matching clips of the main unit below it. Depending on how loose the mounting ring on the motherboard is, you may have to slightly lift the ring so it goes over the notches in the base unit. After all the notches are lined up you can then start tightening the screws that are attached to the back-plate, and then all that's left is to plug in the 3pin power cable from the pump to the CPU header, and the fans on the radiator to an auxiliary 3pin motherboard header.
While it initially may sound complicated, once you've looked at the pictures in the manuals it becomes less of a daunting experience. A quick tip: during the install it can feel like two hands just aren't enough, but the key is to have the radiator unit already mounted in the case before the final stage, as that allows you to focus on the CPU mounting area where you really should be using two hands.
 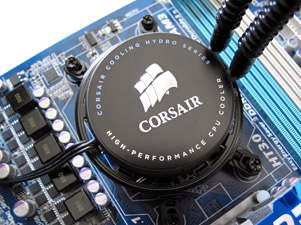
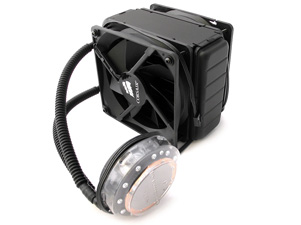
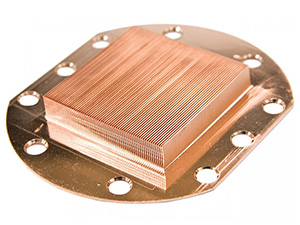
At the business end of the water cooling kit we have the CPU cold plate and integrated pump unit. The cold plate is made from copper and includes a generous amount of thermal compound pre applied to the surface already. The rest of the unit is of a hard plastic construction that feels quite sturdy. nfortunately the finish of the surface that attaches to the CPU itself isn't the prettiest and requires a good amount of thermal compound to be applied compared to smoother surfaces. Nevertheless, it is flat and should provide sufficient heat transfer from the CPU thanks to the copper base and internal fin design.
|
|
Advertisement:
All original content copyright James Rolfe.
All rights reserved. No reproduction allowed without written permission.
Interested in advertising on OCAU? Contact us for info.
|
|


