|
|
Advertisement:
|
|
TIM Shootout with Corsair H70 |
|
Join the community - in the OCAU Forums!
|
Introduction, Testing Setup and Preparations
I've been evaluating the effectiveness of some Thermal Interface Materials (TIMs) used in conjunction with a Corsair H70 sealed liquid CPU cooler and thought I'd share my findings. I decided to go to the effort of testing these after a recent (03/03/2011) Xbit Labs article comparing 26 different TIMs. While it is an interesting article, I noticed they couldnt get the Indigo Xtreme to work for them, essentially dropping it from their results due to insanely high temperatures. In order for the Indigo Xtreme to work correctly it has to be heated up in situ and it must remain horizontal during its 'bedding in' period. The supplied documentation is pretty clear about this, while the guides and videos on the Indigo website are also useful. In short, I found it surprising that Xbit Labs had a result so different to other Indigo Xtreme reviews - even the Xbit Labs reviewer expressed this concern in their article. So I decided to take a look first-hand, and do some testing myself.
Test Setup:
The test system specs are as follows:- Gigabyte P67A-UD7-B3 mainboard
- Intel Core i7 2600K @ 4.5GHz (1.48V) CPU
- Corsair H70 Cooler (manufactured by Asetek)
- Corsair Vengeance CMZ8GX3M2A1600C9 RAM
- Corsair TX-850 PSU
- Gigabyte GTX 560Ti Super Overclock graphics card
- Corsair 128GB Performance 3 SSD
- Samsung Spinpoint F3 1TB HDD
- Windows 7 Pro x64
To get the inevitable question out of the way, this system was only running at 4.5GHz because it was built for a client and I erred on the side of stability and reliability while also wanting to ensure all power saving features were enabled. I also wanted to avoid Load Line Calibration at all costs (as it causes substantial voltage and temp spiking). I found 4.8GHz+ to be unstable without LLC with power saving features enabled (such as C1E, EIST, C3 and C6 states). I may have been able to push it to 4.6 or 4.7GHz, but just getting 4.5 stable and reliable took over a day so we had reached the point of diminishing returns for further speed bumps. Likewise, 5GHz or more may well have been achievable, but not without substantial voltage increases and disabling all power saving features. Sometimes maximum overclock isn't the point of the exercise.
TIMs tested: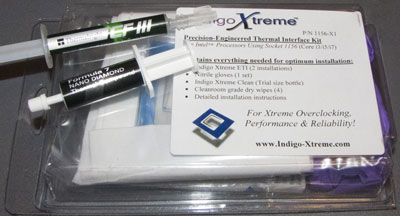
the three aftermarket TIMs
Testing:
These components were set up on a bench and tests were run over several days. After each cooler remount the system was stress tested with Prime95 v26.6 build 1, as I found this to be both the most reliable and stressful test (LinX wouldn't run, while OCCT3 and Intel Burn Test v2 ran but weren't stressing the CPU as much). These Prime95 runs used the in-place large FFT test with 8 threads, and were performed for at least six hours each.
For temperature monitoring I used CoreTemp and RealTemp, with RealTemp providing data collection, logging at 2 second intervals. These logs were imported into Excel, the temps for each core were averaged, and the maximum recorded temp noted. I won't include data on idle temps as variation between tested TIMs was <0.5°C.
Preparation and TIM Application:
Prior to application of any TIM, after the cooler had been removed, the bulk of the thermal paste was removed with dry tissues. A small squirt of citrus-based cleaner was then applied to a clean tissue, which was used to remove any remaining TIM - this step was repeated several times, until wiping the surface failed to discolour the white tissue. The surface was then wiped several times with a clean microfibre cloth, to ensure no dust or lint particles remained. In the case of the Indigo Xtreme, this process was completed before following the recommended cleaning procedure detailed in the supplied documentation.
As an aside, the Indigo Xtreme comes with a cleaning fluid (info in a PDF here) which is proprietary, but isopropyl alcohol is a popular and easily-available alternative. Methanol is also good, but is more toxic and requires more care with handling and storage.
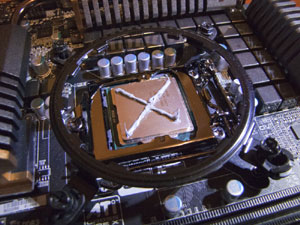
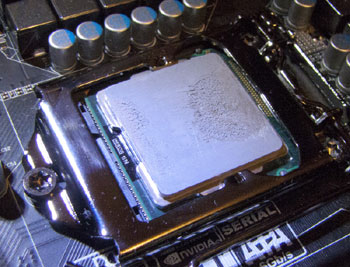
Both the Thermalright Chill Factor III and Antec Formula 7 were applied in an 'X' configuration onto the surface of the CPU heat spreader from corner to corner. I did do some testing with the Chill Factor III applied as recommended by Thermalright, using the supplied applicator card; once very thinly (see below) and once with a moderate amount (only about half the quantity used to apply the 'X').
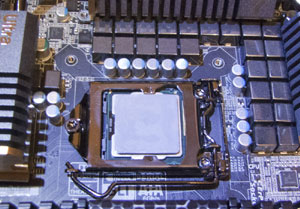
The moderate test showed no significant deviation in recorded temps from the 'X' application (and I only tested for three hours) so that data has been omitted. The 'thin' application however showed a dramatic increase in temps, approximately 10°C higher on average. Upon removal of the cooler, the cause was evident - the surfaces of the H70 cooler plate and CPU heat spreader don't mate correctly as one or other of them isn't flat (to be honest, both surfaces are pretty rough, but particularly the H70). This caused only around 40% contact, leaving a large area where the cooler and CPU didn't touch at all:
 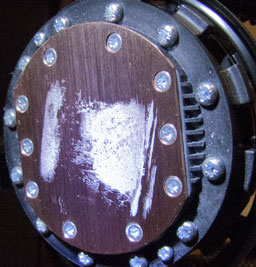
This shows the downside of the popular belief that 'less is best' when it comes to thermal paste. It certainly has merits when your mating surfaces are mirror-flat, but if they're not (or there is any doubt), then erring on the side of 'adequate coverage' (and relying on high mounting pressure) should be your rule of thumb.
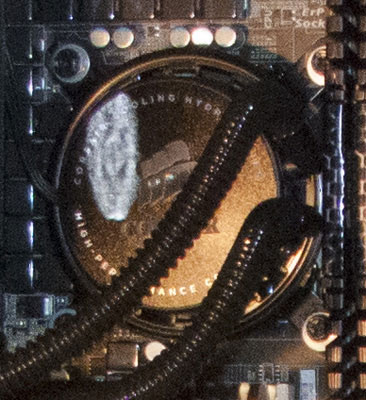
Additionally, I was forced to make a minor modification to the mounting system used on the H70 (see below). After several re-mounts, the plastic alignment guides the screws sit within became deformed due to the pressure it exerts onto the CPU cooler. As the H70 kit doesn't include spare guides, I used some small nickel-plated-steel washers to distribute the mounting pressure more evenly. As there is some flex in the mounting system for the H70, I don't anticipate that the extra depth gained (about 0.5mm) by these washers will have meaningfully increased mounting pressure. For the sake of thoroughness, I added these washers after the original TIM removal but before the data collected for the Chill Factor III (so the original, unmodified mount was only used for the original Corsair TIM, which, as you can see in the results, didn't do it any harm).
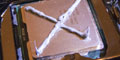
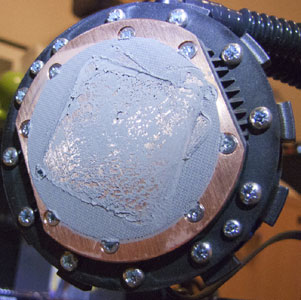
Note that I also mounted the H70 by completely removing the mounting bracket from the mainboard, holding it in position on the keyed lugs on the cooler block and placing the whole thing directly onto the CPU. I then held the whole assembly in one hand while carefully tightening each screw by hand one turn at a time, alternating diagonally, until all screws were finger tight, at which point I released the block/pump and used a screwdriver to tighten the screws the rest of the way (once again tightening one turn and alternating to diagonal screws to ensure an even application of pressure). The prescribed mounting method involves leaving the mounting bracket attached loosely to the mainboard, slotting the block through the keyed holes, twisting the block on the surface of the CPU heat spreader until its mounting lugs are positioned under the bracket's keyed lugs, and then tightening up the bracket. I didn't like the possibility of scraping some of the TIM off with the twisting motion (as the potential for applying uneven pressure is high) and this method wasn't going to work for the Indigo Xtreme, so I devised the above alternative. The below image shows an impression in the TIM demonstrating the degree of twisting required for the standard mounting procedure.
I do understand why Corsair recommend you install the H70 with the bracket preinstalled and twisting the block into place. Direct mounting as I did is quite difficult, particularly for someone with small hands or not much strength, because you're not just holding the block and bracket, you also have to hold the weight of the radiator (and fans, if they're already attached, as they were for me). Having that radiator swinging around over a $400 mainboard is a little disquieting. So if you want to try this method, I recommend ensuring you have an extra pair of hands to assist you. Apparently the mounting method of the H60 has been improved so no twisting is required, so it would be nice to see an H70 refresh with an improved mounting system. Anyway, more on the H70 later.
In preparing the Indigo Xtreme I was very careful to place the H70 block/pump unit directly onto the TIM as noted above, as twisting the cooler on the TIM would have damaged it. I then booted to Windows as normal and started diagnostic software to confirm idle temps were acceptable. Prime95 was started to bring temps up, and I then disconnected both the fans and pump for the H70. Temperatures climbed as high as 98°C on two cores before plummeting 30° suddenly, and then quickly climbing back up. I reconnected the pump and fans and watched the temps fairly rapidly drop and stabilise in the mid 60's. Having successfully primed the TIM, I then performed a clean boot before performing the stress tests and logging temps for comparison.
|
|
Advertisement:
All original content copyright James Rolfe.
All rights reserved. No reproduction allowed without written permission.
Interested in advertising on OCAU? Contact us for info.
|
|