|
|
Advertisement:
|
|
Minitar 802.11g 54mb Wireless Networking Bundle |
|
Join the community - in the OCAU Forums!
|
Introduction, Kit Contents, Features
Wireless networking would have to be one of the coolest things to come to maturity over the last year or so. Quicker video cards and larger hard drives are all well and good, but they don't even approach the sheer convenience of being able to run a network around your home or office without expensive in-wall cabling or the old tape-cables-to-the-floor approach. Of course, the traditional problem with the widespread 802.11b 11mb/s standard has been the speed. Minitar have a few components based on the newer 802.11g standard at 54mb/s, which brings it closer to the speed of wired networks - most of which are 100mb/s Ethernet. PCRange sent over a Minitar kit containing a wireless broadband router, a PCI card for normal PC's and a PCMCIA card for laptops.
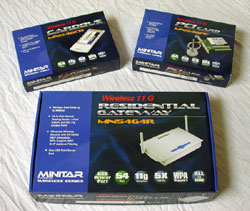
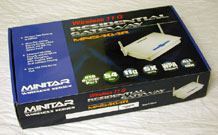
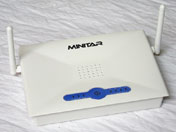
The most feature-packed part of the kit is the MN54G4R Residential Gateway, so we'll look at that first.
The main feature of this box is that it serves as a wireless Access Point, or AP. You can of course run a wireless network without an AP if you like. The various wireless devices talk directly to each other in what's termed an "Ad Hoc Network", but most people will use an AP. In this instance the AP provides a few extra handy features:- Internet Sharing Router with DHCP
- Firewalling with NAT and SPI
- 4-port Ethernet Switch
- Wireless security with 64/128-bit WEP encryption, WPA, MAC or IP address filtering
- Shared USB Printer Port
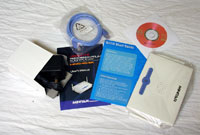
In the package you get a power adapter, a very decent manual, a handy quick-setup guide, a CD containing drivers etc, a short length of cable to connect the AP to your ADSL or cable modem and of course the AP itself. Note that the CD's we received for these 3 samples were unmarked, but the normal retail units will have a full printed-label CD included.
 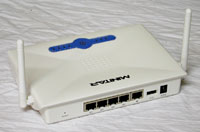
On the back of the unit you can see, from left to right: a pinhole reset button, the four RJ45 ports of the inbuilt Ethernet switch, the Ethernet uplink port, the USB printer port and the power connector. Note that the uplink port is meant to connect to an external ADSL or cable modem. It can be used to some degree as a fifth ethernet port but it behaves differently to the others. For example, the hub won't assign an address to a device on this port via DHCP. Of course, it can be - and most likely will be - assigned an address using DCHP from your ISP.
On the top of the unit there is a nice blue LED indicating when the unit is powered. To the left of this are three smaller green LED's indicating activity on WLAN (wireless), USB (the shared printer) or WAN (the fifth RJ45 connector). To the right are four identical green LEDs indicating activity on each of the four Ethernet ports. On the bottom of the unit are holes which can be used to mount the unit to a wall. The two antennae can rotate - however you orient the unit, be it on a desk or a wall, it's best to keep the antennas vertical. Knocking the antenna on my old 11mb/s AP to even a 45 degree angle has a noticeable effect on connection reliability. Having two antennas hints at good signal strength - we'll see if it's any better than the single-antenna 11mb/s unit later.
Setting up the MN54G4R is simple. It's a stand-alone network device, so you don't need to install any drivers on your PC for it. Simply connect to it using one of the Ethernet ports, which can either go directly to an Ethernet port on your PC or to another Ethernet hub/switch and then to your PC. Using a web browser, connect to the preset address (192.168.1.253), login with the default username/password and you're ready to go. You first run through the Typical Configuration, which sets basic things like the local timezone, connection information for your ISP etc. I am in an area without broadband at the moment, so I left that side of things blank. You can give your wireless network a name which will appear when people browse with wireless devices, set up encryption, assign a password to the network etc. The manual is helpful but most options are fairly obvious.
There is of course a Custom Configuration option, which allows you to tweak settings in much more detail. Some of them only the hardcore wireless geeks will care about, but you can leave the vast majority of them set to the default. Once you have this set up, you're ready to try connecting to the unit wirelessly.
In order to get a PC communicating over wireless, you need a wireless network adapter. PCI is of course the most sensible choice for most PC's.
This card can be considered essentially the same as a wired Ethernet card, without the wire. In place of an RJ45 jack we have this gold Male RP-SMA antenna connection, which can be used with the provided antenna or you could hook up something else. The cord for the included antenna is long enough to rest the antenna on top of a miditower, but not long enough for a fulltower. Of course, you can just rest it on the desk if you like. Considering that the 11mb/s card from Minitar had the antenna protruding directly from the back of the card and thus buried behind the PC, this arrangement is an improvement.
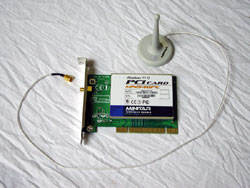
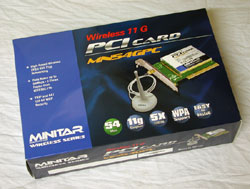
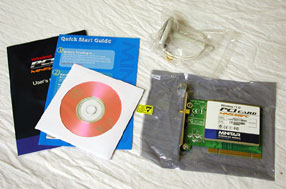
The package for the MN54GPC PCI adapter includes an excellent manual, a quick-setup guide, a CD with drivers etc, the card itself and the dipole antenna.
Setup wasn't trivially easy, but it's not too difficult. I installed the card into an Win2K PC and immediately on booting, followed the prompts to install the appropriate drivers. However, you do need to use the auto-run menu on the CD to install some additional software. Once you install that, you are prompted from the system tray that there are wireless networks available. Of course in my location there were two - my existing 11mb/s network and the new 54mb/s network I had earlier configured on the new AP. After selecting either I was prompted for the password I'd assigned on the AP earlier - after entering that I was able to browse the LAN and indeed the Internet over the wireless link.
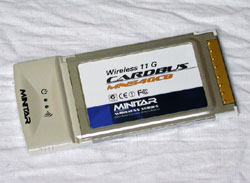
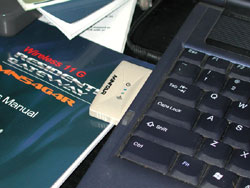
The real benefit of wireless, of course, is that it's portable. A laptop PC with a charged battery is unfettered by a power cable, but if you're dragging an Ethernet or phone cable around so you have net access, it limits your portability. Some recent portable computers have wireless support built in, but some - like my Sony VAIO PCG-FR700 laptop - don't, or they only have the older 11mb/sec standard. PCMCIA or "PC Card" wireless adapters are a logical solution as the PCMCIA standard is well established and most portable PC's have at least one or two slots.
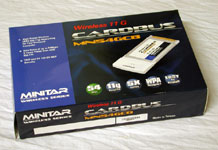 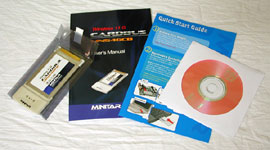
Again, we have a package containing a manual, a quick-setup guide, a cd with drivers etc and the card itself. This, like most PCMCIA wireless cards I've seen, has no jack for an external antenna. This seems likely to limit the range and indeed, the box specs for the PCI card list range as "Outdoor: up to 450m; Indoor: 125m" while the PCMCIA card's box simply states "Up to 350M".
Even though the cards use very different physical connectors, the software and driver installation process for the PCMCIA card is the same as the PCI card and very simple.
Once active, the PCMCIA card has two bright blue LEDs - one for power and one that flickers, indicating WLAN activity. They're bright enough to be a little distracting, but not annoying.
|
|
Advertisement:
All original content copyright James Rolfe.
All rights reserved. No reproduction allowed without written permission.
Interested in advertising on OCAU? Contact us for info.
|
|